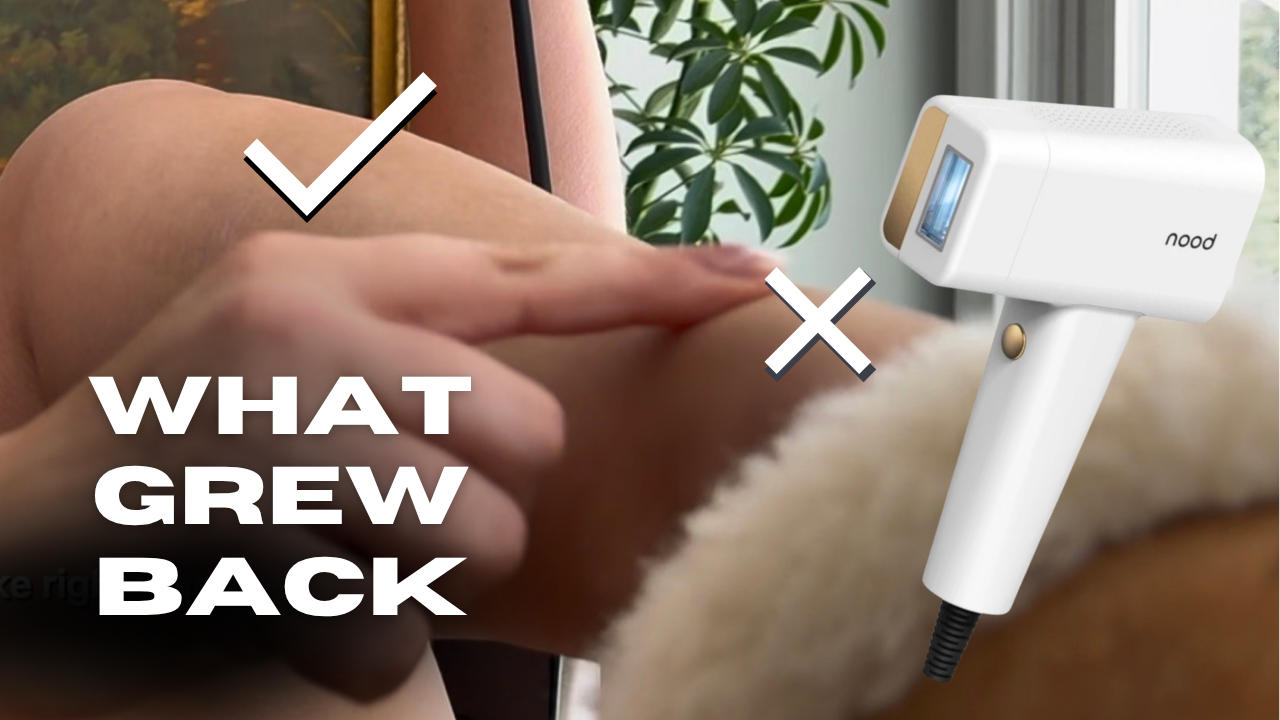
Does Nood work? Short answer: yes, for the people IPL works for. That means dark hair (black, brown, or dark blonde) on very fair to light brown skin, a steady schedule for about two months, and touch-ups after that. What it delivers is less hair and finer regrowth, not permanent hair removal, and it is not a match for a clinic laser. If your hair and skin fit the chart, the Nood Flasher Pro is a reasonable buy. Here’s what to look for before spending the money.
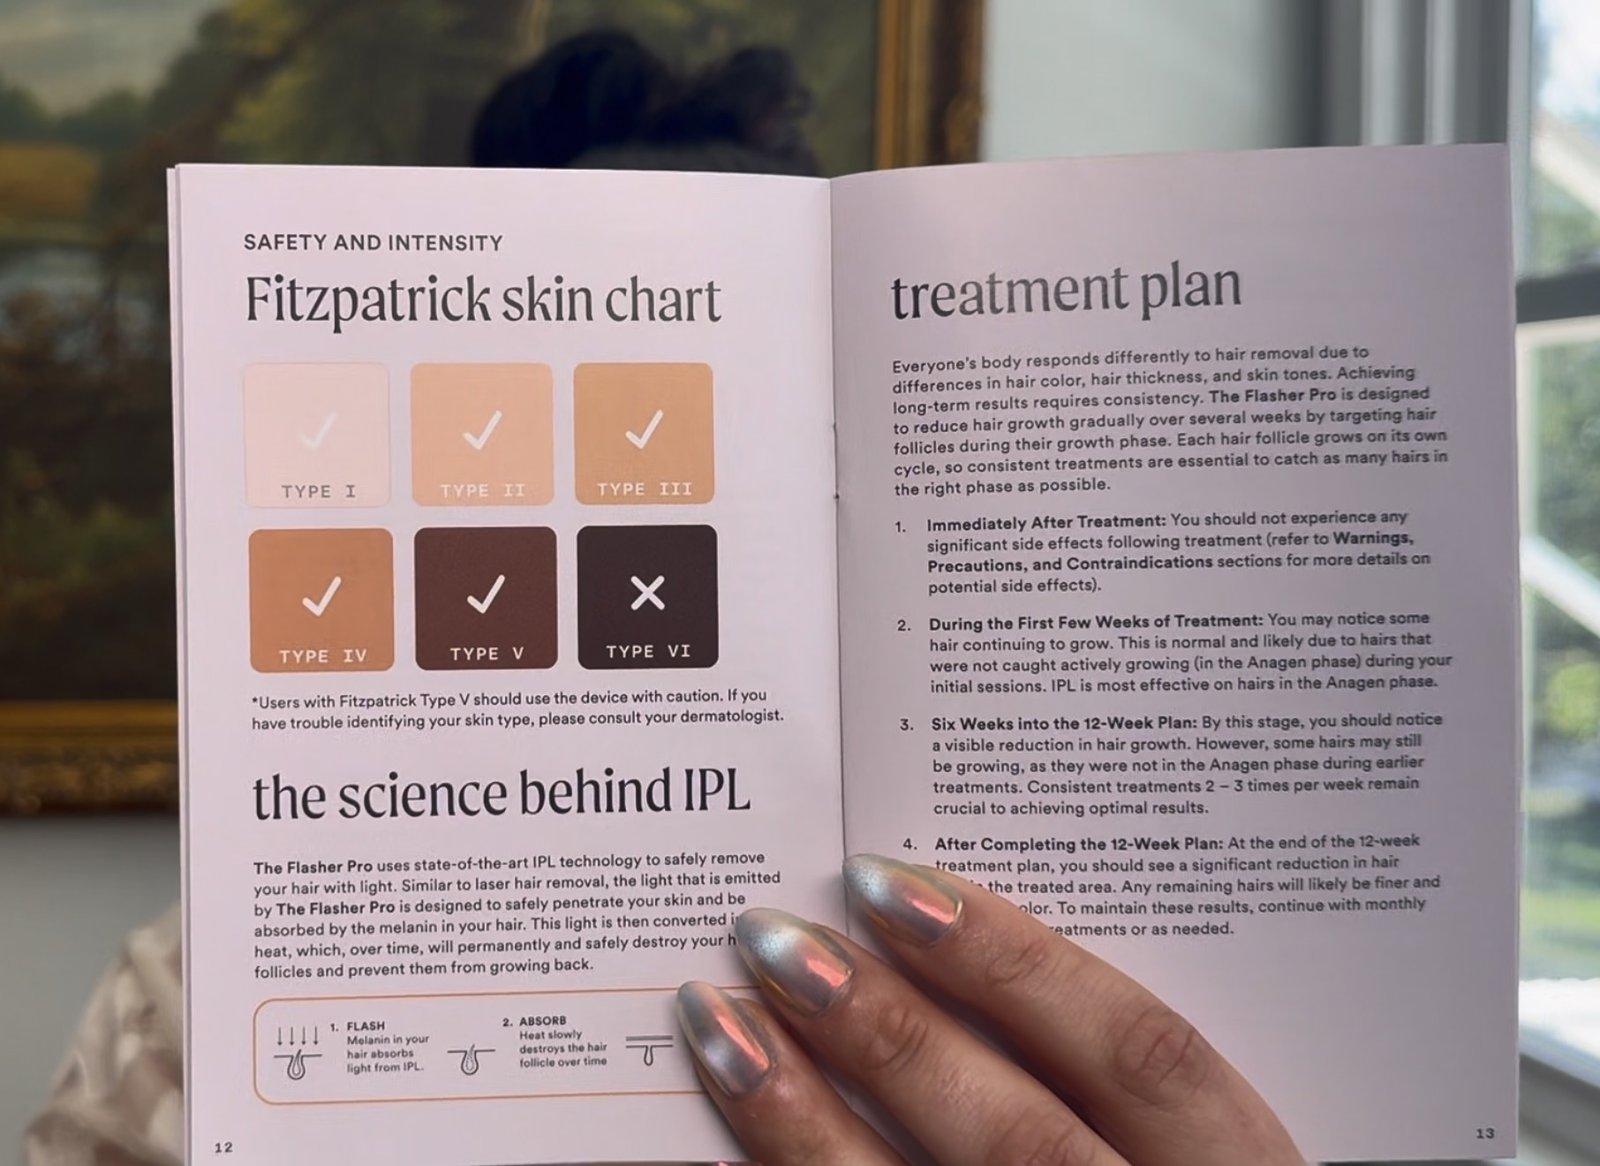
It works on: black, brown, and dark blonde hair on very fair, fair, and olive to light brown skin. That is Nood’s own chart.
It does not work on: light blonde, red, or grey hair. Nood also lists brown and dark brown to black skin as not recommended.
What you get: hair reduction that lasts while you keep up maintenance. Not permanent removal.
What it takes: sessions twice a week for about two months, then touch-ups.
What it is not: a clinic laser. Professional devices run at higher energy and get there faster.
What working means for an IPL device
The Nood Flasher Pro is an intense pulsed light (IPL) device. Pigment in the hair absorbs the flash and turns it into heat, and that heat damages the follicle enough to slow regrowth. No pigment in the hair, no result. Too much pigment in the skin, and the skin takes the heat instead.
The device is FDA cleared, not FDA approved. Its clearance, 510(k) K241106, covers removal of unwanted hair and permanent reduction in hair regrowth. The FDA file defines that as a long-term, stable reduction in the amount of hair regrowing, measured at 6, 9, and 12 months after a treatment course. The same file states that no clinical study was performed for the clearance. Cleared means substantially equivalent to devices already on the market. It is not proof of a specific result.
So the useful question is not whether Nood removes hair forever. It is whether at-home light devices reduce hair, and by how much.
What the research says about at-home devices
No published trial has tested the Nood itself. The evidence is for the category.
A 2012 systematic review in the Journal of the European Academy of Dermatology and Venereology found seven studies of home light devices. Hair reduction ranged from 6% to 72% after repeated treatments. Most of the studies were uncontrolled, and the authors described the evidence as short term.
A 2015 randomized trial in the British Journal of Dermatology followed women through eight weekly treatments with a low-energy home laser. Growing hair dropped by up to 59%, and the hair that remained was up to 38% thinner. Three months after treatment stopped, hair counts were back above where they started.
A 2023 study in PLOS ONE compared a professional diode laser with a home device on underarms over six sessions. The professional laser reached 85% to 88% hair reduction. The home device reached 46% to 52%. It was small, with 15 people finishing.
Dermatologists read it the same way. Rachel Ward, MD, of Cleveland Clinic, says at-home devices have less power than office lasers and do not work as well, and that they suit light skin with dark hair.
The takeaway: these devices reduce hair while you keep using them. Stop, and hair comes back. Plan on maintenance from the start.
Will Nood work for you?
Hair color and skin tone decide it. This is how Nood’s chart sorts out.
Your hair and skin
Nood’s chart
The move
Black or brown hair, very fair to olive skin
Good fit
IPL is built for this contrast
Dark blonde hair, fair skin
Good fit
IPL works, with less pigment to target
Light blonde, red, or grey hair
Not recommended
Electrolysis, or dermaplaning for facial fuzz
Brown to dark brown or black skin
Not recommended
A clinic consult. Office lasers cover more skin tones
Tattoos in the treatment area
Do not flash over them
Work around them
The skin type chart from the Nood manual. Check it against your own skin before buying.
Nood’s FAQ sets the schedule at twice a week for the first two months, then a touch-up every three to six months as needed. Its product page words it differently: every three days for up to 12 weeks, then monthly. Either way, budget two to three months before judging it.
The listing promises visible results after the first use. A better checkpoint is the end of the starter schedule. Hair grows in cycles, and light only affects follicles in the active growth phase, which is why every source calls for repeated sessions.
What works here:
Shave first. Nood says to shave the whole treatment area so the light reaches the follicle.
Skip waxing, plucking, threading, and epilating. Nood says they reduce effectiveness, because the follicle has to be intact.
Start at level 3 of 5 and move up or down by comfort. That is Nood’s guidance. The cooling plate, which Nood calls CryoSoothe, keeps the skin cool during flashes.
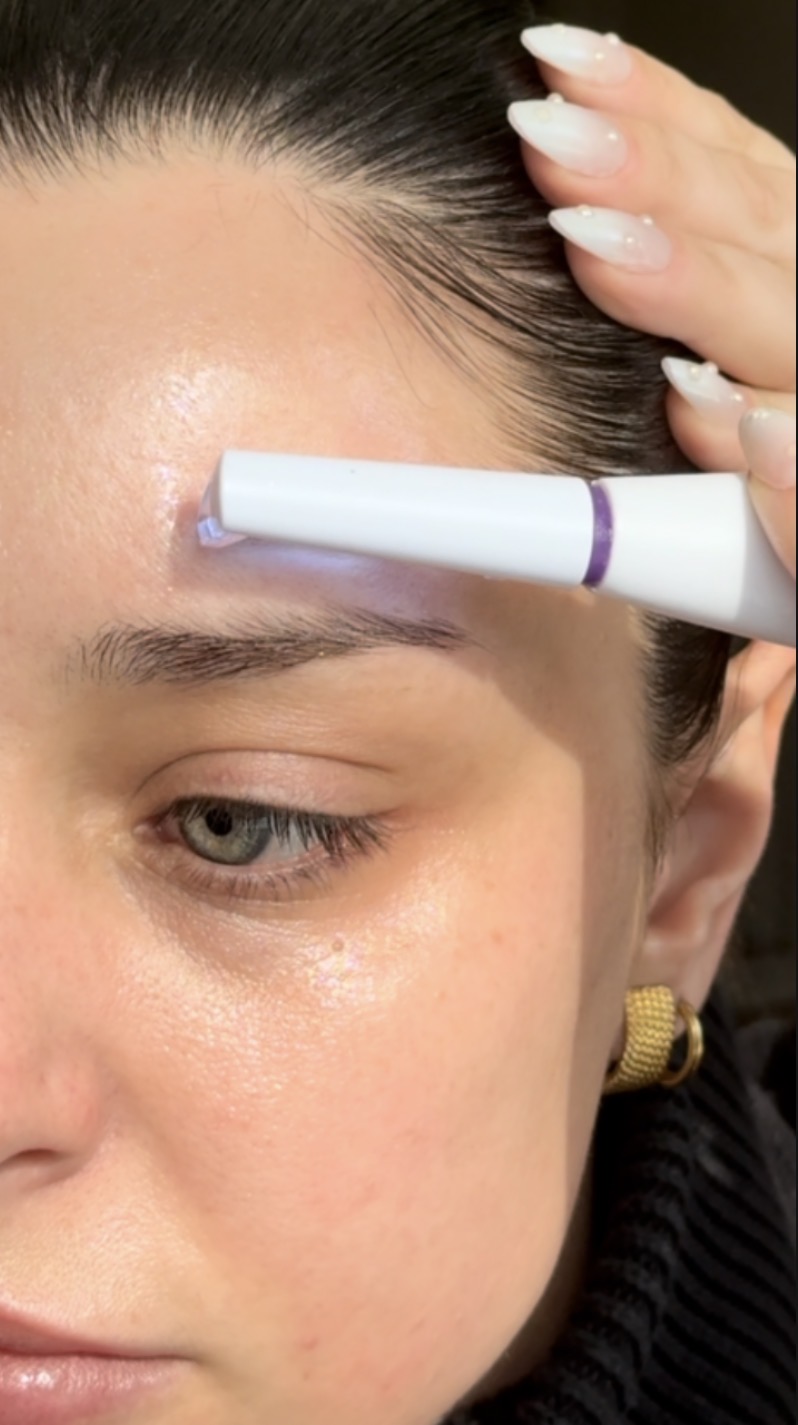
Keep it off tattoos and away from the eyebrows and eye area.
Where Nood falls short
It is not permanent removal. Light devices are cleared for permanent hair reduction. Electrolysis is the method recognized for permanent removal.
It is weaker than a clinic laser by design. Even clinic laser is not one and done: the American Academy of Dermatology says most patients need two to six treatments and may need maintenance after that. The cost and session math is in Nood vs laser hair removal.
The marketed energy figure runs higher than the cleared one. Nood’s product page says 7 J/cm². The FDA file for the Flasher Pro’s model clears 1.84 to 5.23 J/cm². Go by the cleared range.
The brand guarantee has a catch. Nood’s 90-day guarantee refunds the purchase minus a restocking fee. Read the return terms wherever you buy.
It is corded. The box includes a six-foot power adapter, so plan to sit near an outlet.
Is the Nood Flasher Pro worth it?
Worth it if your hair and skin fit the chart, you want to treat more than one area, and you will keep the twice-weekly schedule for two months. A clinic charges by the area. The device is one purchase for all of them.
Skip it if your hair is light blonde, red, or grey, if your skin tone is on the not recommended side of Nood’s chart, if you want one small area gone for good (book electrolysis), or if you want the fastest result and have the budget for a clinic.
The Flasher Pro also ships with a second lens for skin, the Ageless lens. Treat it as a bonus, not the reason to buy. The details are in the Nood Ageless lens review.
Still comparing brands? The full IPL comparison shows what each brand publishes about its energy output, and what it leaves out.
Yes, for dark hair on very fair to light brown skin, as long as the schedule is kept up. It reduces hair and thins regrowth. It does not remove hair permanently, and it does not work on light blonde, red, or grey hair.
Is Nood FDA approved?
No. The Flasher Pro is FDA cleared under 510(k) K241106, which means the FDA found it substantially equivalent to devices already on the market. Cleared and approved are different things, and at-home IPL devices are cleared.
How long does Nood take to work?
Nood’s schedule is twice a week for the first two months. Judge it at the end of that stretch, not after one session.
Is Nood permanent?
No. The cleared claim is permanent hair reduction, and research on home devices shows hair returning after treatment stops. Nood itself recommends touch-ups every few months.
Can you use Nood on your face?
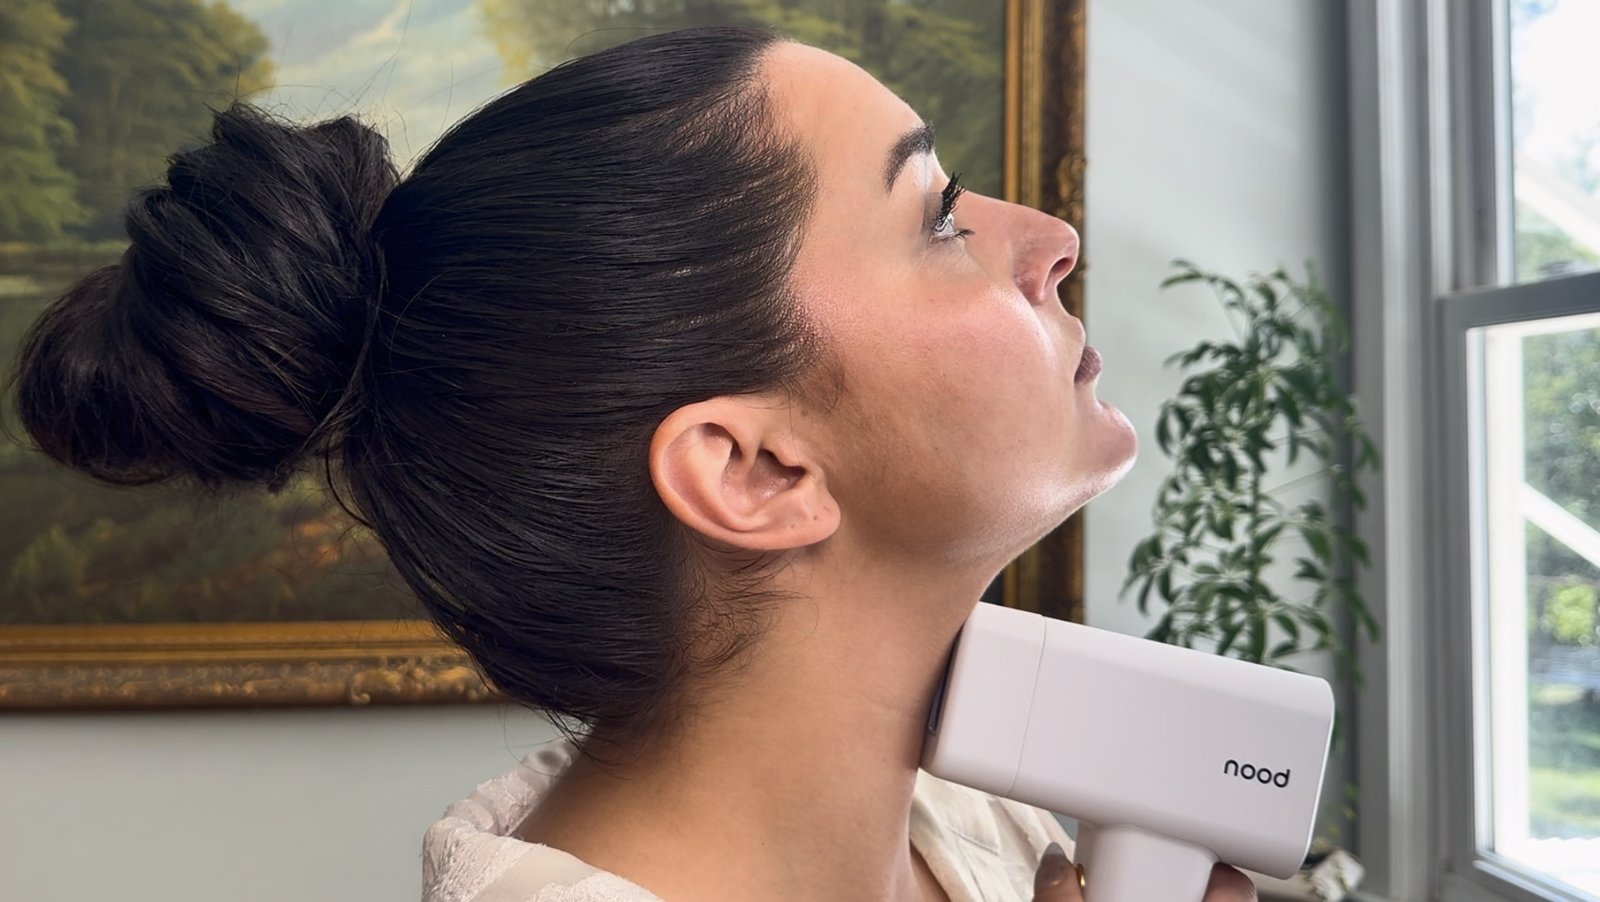
Nood lists the chin and neck among its treatment areas and says not to use it on the eyebrows or around the eyes. The FDA clearance wording is facial hair below the chin line. Peach fuzz is usually too fine and light for IPL to target. For that, see the best at-home dermaplaning tools.
Does Nood work as well as laser hair removal?
No. Clinic lasers run at higher energy and reach a result in fewer sessions. What the at-home device offers is one purchase that covers every area, on your own schedule. The numbers are in Nood vs laser hair removal.
Does Nood work on blonde hair?
On dark blonde, yes, according to Nood’s chart. On light blonde, no. There is not enough pigment in the hair for the light to target. More in Does Nood work on blonde hair?
Checked October 2026 against Nood’s Flasher Pro product page and FAQ, the Amazon listing, FDA 510(k) K241106, Thaysen-Petersen et al. (Journal of the European Academy of Dermatology and Venereology, 2012, and British Journal of Dermatology, 2015), Hendricks et al. (PLOS ONE, 2023), Cleveland Clinic, and the American Academy of Dermatology. This post is general information, not medical advice.
A realistic Nood Ageless lens before and after is a change in tone, not a change in lines or face shape. If the lens does its job, it shows up as softer dark spots and calmer redness, and Nood’s own timeline puts the best results at 8 to 12 weeks of consistent use. Wrinkles are the part to expect to look the same. So the verdict is simple: worth running if more even tone is the goal and your skin is in the fair to olive range (Fitzpatrick I to IV), and the wrong tool if fine lines are the goal.
Last updated: November 11, 2026
My pick if you want to try it at home
The Nood Flasher Pro, which ships with the Ageless lens. Nood has it at $299 today, down from $379, in its Black Friday sale (checked November 11). Prices move fast this month, so check both before you buy.
Here’s what to look for when buying: the Ageless lens ships in the box with the Flasher Pro as the second of its two detachable lenses, next to the hair removal lens. Check the Nood Flasher Pro on Amazon.
Nood Ageless lens before and after: the quick verdict
What you are tracking
Realistic change
What that is based on
Dark spots and sun spots
The most likely place to see a difference
The Ageless lens filters light to 560 to 1100nm, and pigment is what clinic IPL has the strongest record on
Redness and blotchiness
May look calmer over time
Nood says changes in pigmentation irregularities or redness can take several weeks
Overall tone and texture
Subtle and gradual
Nood says some users notice subtle improvements after a few sessions
Fine lines and wrinkles
Plan on no visible change
A biopsy study of clinic IPL found no clinically noticeable wrinkle improvement after six sessions
Firmness and pores
Unproven
Brand claim only, with no device-specific data behind it
The timeline: what to expect week by week
The move is to judge this lens on Nood’s own schedule, not on a single week. This is what the brand says, next to what is worth looking for at each point.
When
What Nood says
What to look for
Sessions 1 to 3
Some users notice subtle improvements in tone and texture after a few sessions
Nothing obvious yet is normal. Take the before photo before the first flash.
Around week 4
The product page promises visibly younger skin in as little as one month
The first honest photo comparison. Look at the darkest spot, not the whole face.
Weeks 8 to 12
Most users see the best results after consistent use for 8 to 12 weeks
This is the real after photo. If the spots look the same here, the lens is not doing much for your skin.
After week 12
The product page says to keep going 2 to 3 times per week on an ongoing basis. The getting started guide lists maintenance every 4 to 6 weeks.
Nood frames results as something to maintain with continued sessions, not a one-time fix.
One caution on the numbers. Nood’s anti-aging page lists figures like 91 percent seeing a visible reduction in fine lines, and the attribution under them reads “results based on published IPL studies.” Those are not results from this device, so they should not set the bar for a before and after at home.
Why clinic before and afters look more dramatic
Most of the striking IPL before and after photos online come from in-office machines. A clinic photofacial runs at higher energy with an operator choosing the settings, and the pattern is well documented: treated brown spots often darken first, then fade over roughly 7 to 14 days, across a series of sessions spaced about a month apart, according to Walk-in Dermatology.
The Ageless lens is a lower energy, at-home take on the same idea, so it makes sense to plan for a slower and subtler change: gradual fading over weeks, not a spot that darkens and lifts in days. The full energy comparison is in Nood Ageless Lens vs an In-Office IPL Photofacial.
What the Ageless lens will not change
Wrinkles. Researchers took skin biopsies from six volunteers before and after six clinic IPL sessions and measured collagen and elastin. They reported no clinically noticeable improvement in facial wrinkles and no statistically significant change in the proteins they measured (El-Domyati et al., Journal of Drugs in Dermatology, 2011). That was clinic strength IPL, and there is no reason to expect an at-home lens to do more.
One more thing worth knowing before judging results: the Flasher Pro’s FDA clearance is for hair removal, and the skin lens sits outside it. The Nood Ageless Lens review covers that in detail, along with the full how-to.
How to take a before and after photo you can trust
The reason most at-home before and afters prove nothing is lighting. What works here is a fixed setup that never changes:
Shoot the before photo first. Clean, bare skin, before the first session.
Same place, same light. Stand in the same spot at the same time of day, facing the same window or lamp.
Same distance and angle. A phone tripod or a piece of tape on the floor does the job. Take front, left, and right.
No help from the camera. Rear camera, no filter, no portrait mode, no beauty setting.
Pick a day off from the device. That way any temporary warmth or pinkness from a session does not skew the photo.
Compare the checkpoints. Week 0, week 4, week 8, and week 12, side by side. Pick one or two specific spots and judge those.
Watch: how a session with the Ageless lens runs
This video walks through what the 560nm filter is, how to prep skin, and how a session runs, including keeping the plate flat and working in passes across the cheeks, jaw, and forehead.
How to give the lens its best shot
A before and after is only as good as the routine behind it. Nood’s getting started guide sets the basics:
Start with clean, dry skin. Remove makeup, SPF, and actives like retinoids, acids, and vitamin C first.
Start low. Nood’s guide says level 1 to 2 for the Ageless lens. The walkthrough video above runs level 3 of 5.
Mind the no-go zones. Single flashes on the face and neck, and nothing on the eye area, lips, or dark moles.
Stay consistent. Two to three short sessions a week is what the 8 to 12 week timeline assumes.
Protect the result. Moisturize after, skip actives for 24 hours, and wear SPF 30 or higher every day.
Nood says some users notice subtle changes in tone and texture after a few sessions, with the best results after 8 to 12 weeks of consistent use. Plan on judging the Nood Ageless lens at week 8 at the earliest, using progress photos taken in the same light, at the same angle and with no makeup each time.
Does the Nood Ageless lens really work?
The Nood Ageless lens filters light to 560 to 1100nm, the range IPL uses for pigment and redness, so dark spots and uneven tone are where a change is plausible. Nood’s results figures for skin are attributed to published IPL studies, not to a trial of this device, so treat it as a reasonable bet for tone and not a guarantee.
Does the Nood Ageless lens get rid of wrinkles?
Do not buy the Nood Ageless lens for wrinkles. Nood markets it for the appearance of fine lines, but a biopsy study of clinic strength IPL found no clinically noticeable wrinkle improvement after six sessions. Where a change is plausible is tone: softer dark spots and calmer redness, which is what a realistic before and after shows.
How often should you use the Nood Ageless lens?
Nood’s product page says 2 to 3 times per week on an ongoing basis. Its getting started guide lists two sessions a week for the first eight weeks, then maintenance every 4 to 6 weeks. Consistency matters more than intensity, because Nood’s own timeline puts the best results at 8 to 12 weeks.
Can you use the Nood Ageless lens on dark skin?
No. Nood lists the Ageless lens for Fitzpatrick skin tones I to IV and says IPL is not safe or suitable for brown or dark brown to black skin tones. If you are unsure where your skin falls, check the skin tone chart on Nood’s product page and talk to a dermatologist before the first session.
Walk-in Dermatology, How Long Does It Take for Brown Spots to Fade After IPL: walkindermatology.com
El-Domyati et al., Intense Pulsed Light Photorejuvenation: A Histological and Immunohistochemical Evaluation, Journal of Drugs in Dermatology, 2011: jddonline.com
This post is general information, not medical advice. Talk to a dermatologist about your own skin.
Here is how to use the Michael Todd microdermabrasion tip: swap the dermaplaning blade on your Sonicsmooth for a Microsmooth diamond tip, cleanse and dry your face, pick a speed, hold the tip at a 45 degree angle starting near the hairline, and make short strokes that follow the contours of your face, one to three passes per area. Michael Todd Beauty recommends it once a week, as an in-between step a few days after your weekly dermaplaning session, not on the same day. If you want microdermabrasion with suction and pore extraction instead of a tip on your dermaplaning tool, that is a different device, the Sonic Refresher, covered further down.
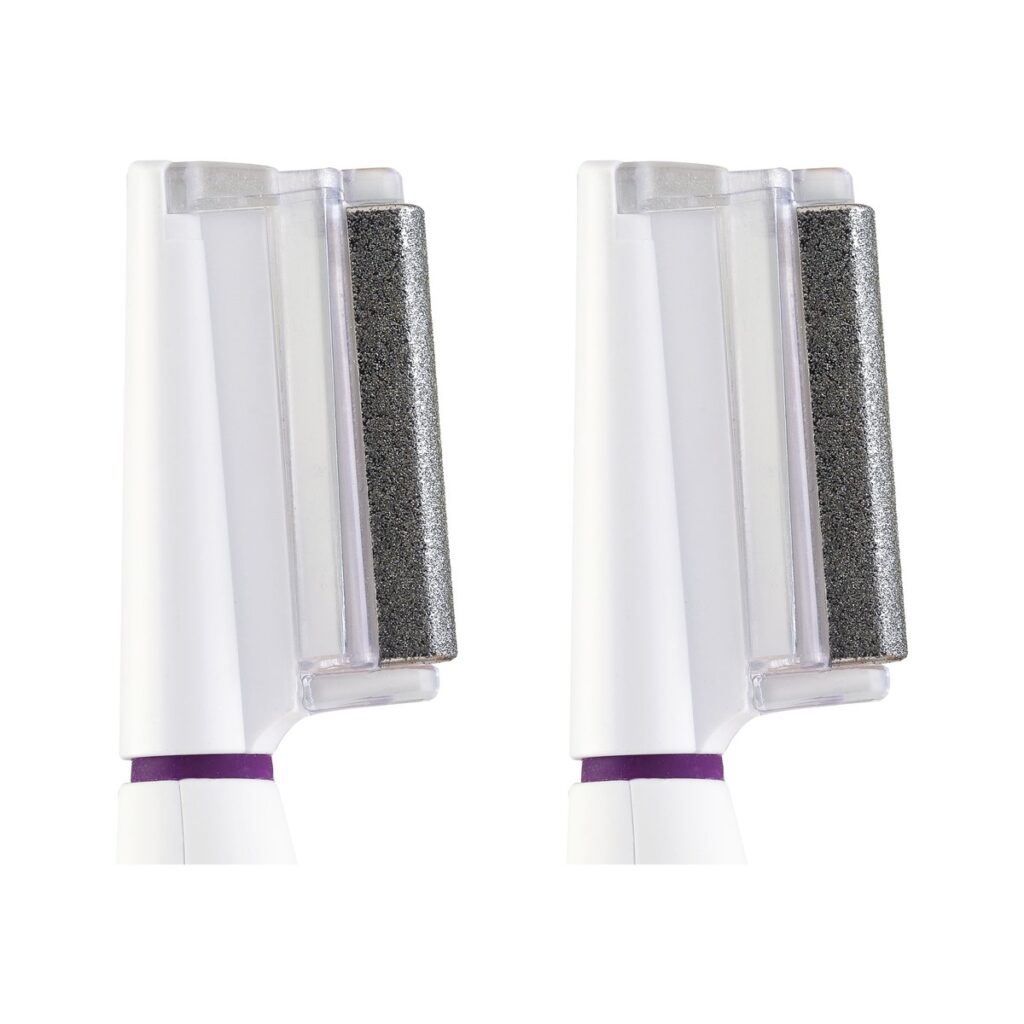
The Sonicsmooth Pro+ comes with 2 Microsmooth tips. On sale at Michael Todd Beauty, 40% off (checked November 13, 2026).
The short version
What it is: Microsmooth is a diamond microdermabrasion tip that attaches to the Sonicsmooth in place of the blade. It buffs away dead skin with fine diamond particles and uses sonic vibration rather than suction.
Where to get it: two Microsmooth tips come in the box with the Sonicsmooth Pro+, and replacement two-packs are sold separately.
How often: once a week, as the brand puts it, an intermediate treatment between weekly Sonicsmooth sessions.
How: clean, dry skin, 45 degree angle, short strokes along the contours, one to three passes per area, then serum or moisturizer.
Not the same as the Sonic Refresher: that is Michael Todd’s standalone wet/dry microdermabrasion system with suction pore extraction and a mist. Different device, different steps.
Which Michael Todd microdermabrasion do you have?
Searches for “Michael Todd microdermabrasion” can mean either of two products, and the instructions are not interchangeable. Check this first.
Microsmooth tip
Sonic Refresher
What it is
A diamond microdermabrasion tip for the Sonicsmooth dermaplaning device
A standalone wet/dry sonic microdermabrasion and pore extraction system
How it exfoliates
Laser-cut diamond bits with sonic vibration, no suction
Diamond heads plus vacuum suction
Heads
One tip that swaps in for the blade, sold in two-packs
Coarse, fine and small fine diamond heads, plus three pore extraction heads
Extras
None, it rides on the Sonicsmooth
Nano mist for water or toner, 40 disposable filters, charging cradle
Speeds
The Sonicsmooth’s 3 speeds
Multiple speeds shown on an LCD
Brand’s frequency
Once a week, between weekly dermaplaning sessions
Once a week
Where it sells
In the Sonicsmooth Pro+ box, and as a two-pack on Amazon
Michael Todd Beauty’s own site
Best for
Anyone who already dermaplanes with a Sonicsmooth
Anyone who wants pore extraction and does not dermaplane
If you already own a Sonicsmooth Pro+, look in the box before you buy anything. The two Microsmooth tips are the small diamond-coated heads packed alongside the 16 dermaplaning blades.
The Microsmooth tips: diamond-coated heads that go on the Sonicsmooth in place of the blade. Image: Michael Todd Beauty.
How to use the Microsmooth microdermabrasion tip, step by step
Swap the blade for the tip. Remove the dermaplaning blade from the Sonicsmooth and attach a Microsmooth tip in its place. Make sure it is firmly seated before you turn the device on.
Cleanse with an oil-free cleanser. Rinse well and pat your face completely dry. The tip works on bare, dry skin, so skip oils and serums until the end.
Pick a speed. The Sonicsmooth has three. Start on the lowest setting the first few times and move up only if your skin is comfortable.
Hold the tip at a 45 degree angle. Start near the hairline and work down the face in sections.
Use short strokes that follow your contours. Forehead, cheeks, along the jaw and chin. Keep the tip moving and let it glide rather than pressing it in.
One to three passes per area. That is the brand’s range. One pass is plenty for a first session.
Follow with serum or moisturizer. Freshly exfoliated skin is the point where your skincare goes on most evenly. The Pro+ listing also advises holding off on makeup right after using the device.
Clean the tip. Take it off the device, rinse it under warm water, and let it air dry before you put it away.
The blade and the diamond tip do different jobs. The blade shaves off peach fuzz and the top layer of dead skin. The Microsmooth tip only buffs. Michael Todd Beauty positions Microsmooth as the step in between weekly Sonicsmooth sessions, and its how-to page suggests using the Microsmooth tips two to three days after you dermaplane. Its support article puts the Microsmooth frequency at once a week.
A simple rhythm that follows the brand’s guidance:
Do not stack both on the same day. Two exfoliating steps back to back is the fastest way to end up red and tight. If your skin still feels sensitive from dermaplaning, skip the Microsmooth that week.
The video below walks through the Sonicsmooth Pro+ dermaplaning routine that the Microsmooth step builds on.
At Home Dermaplane Tutorial Using Michael Todd Beauty Sonicsmooth Pro+
Who should go slow or skip it
Sensitive skin: the brand says Microsmooth suits all skin types, including sensitive skin, and that the speed setting lets you adjust the intensity. The move is the lowest speed and a single pass.
Irritated, broken or sunburned skin, or an active breakout: work around those areas or wait until they settle.
A skin condition or prescription skincare: check with a dermatologist before adding any exfoliating tool. Michael Todd’s own Sonic Refresher guide says the same for anyone under a doctor’s care for a skin condition or with very sensitive skin.
How to use the Michael Todd Sonic Refresher instead
If the device in your hands has a mist reservoir and suction heads, it is the Sonic Refresher. The quick start guide lays out a five-step routine, each step using the same glide technique.
Prep: charge it fully before the first use, test on a small area, cleanse and pat dry, and put a new disposable filter under the head.
Renew, coarse tip: short upward and outward strokes on the face. Keep it away from the thin skin around the eyes and lips.
Reset, small tip: the tight spots, around the nose, mouth lines, crow’s feet, between the brows and the forehead.
Refine, fine tip: a final polish before skincare or makeup.
Remove, pore extraction tip: suction lifts out congestion. Keep it moving the whole time.
Rehydrate: fill the reservoir with water or toner and mist. No oil-based products in the mister.
Technique for every step: work in one to two inch sections, hold the skin taut with your free hand, start on low speed, and begin with two to four passes, moving up to four to six once your skin is used to it. Never hold it still on one spot. The brand’s support article puts the Sonic Refresher at once a week. The guide also notes the device contains magnets, so keep it away from pacemakers and other implanted devices.
The Sonic Refresher does not show up on Amazon. It sells on Michael Todd Beauty’s site, with a 30-day money-back guarantee and a 3-year warranty listed on the page.
How do you use the Michael Todd microdermabrasion tip?
Swap the blade on your Sonicsmooth for a Microsmooth tip, cleanse with an oil-free cleanser and pat dry, choose a speed, then hold the tip at a 45 degree angle starting near the hairline and make short strokes along the contours of your face, one to three passes per area. Finish with serum or moisturizer.
How often can you use Michael Todd microdermabrasion?
Michael Todd Beauty recommends once a week for both the Microsmooth tip and the Sonic Refresher. For Microsmooth, the brand places it between weekly dermaplaning sessions, a few days after you use the blade.
Can you dermaplane and use the Microsmooth tip on the same day?
The brand frames Microsmooth as an in-between treatment, and its how-to page suggests the tips two to three days after dermaplaning. Spacing them out keeps you from exfoliating twice in one session.
Does the Sonicsmooth Pro+ come with microdermabrasion tips?
Yes. The Pro+ listing includes 16 dermaplaning blades and 2 Microsmooth exfoliation tips. Replacement Microsmooth tips are sold in two-packs.
Is Michael Todd microdermabrasion safe for sensitive skin?
The brand says both Microsmooth and the Sonic Refresher suit all skin types, including sensitive skin, with speed settings to adjust intensity. Start on the lowest speed with a single pass. If you have a skin condition or very sensitive skin, check with a dermatologist first.
How do you clean the Microsmooth tip?
Remove it from the device, rinse it under warm water after every use, and let it air dry.
The short answer: for peach fuzz and a smoother makeup base, dermaplaning is the better pick. There is no pulling and no sting, it exfoliates while it removes hair, and there is no grow-out phase. Waxing is the better pick for darker, coarser hair on the upper lip or chin, because it pulls hair out at the root and one session lasts about three to four weeks. One rule settles it for a lot of people: if retinol or a prescription retinoid is part of your routine, waxing your face is the method dermatologists warn about.
A small blade glides over the skin and cuts hair at the surface
Wax grips the hair and pulls it out at the root
What comes off
Peach fuzz (vellus hair) and dead surface skin
The whole hair, root included
How long it lasts
Shorter. Hair is cut, not pulled, so regrowth shows sooner
About three to four weeks per session, per Cleveland Clinic
How often
No more than once a week, per a Cleveland Clinic dermatologist
Only once hair has grown back long enough for wax to grip
Hair length needed
None
About one-fourth to three-fourths of an inch, per the American Academy of Dermatology
How it feels
No pulling, so no sting
A quick sting with every pull
Skin bonus
Exfoliation, so skin feels smoother and makeup sits better
Some exfoliation, but that is not the point
Main risks
Nicks, a day or so of irritation, and flare-ups if used over active acne
Redness, ingrown hairs, inflamed follicles, and skin damage on retinoid-treated skin
Best for
Fine, light fuzz across the whole face
Dark or coarse hair in small areas like the upper lip and chin
What dermaplaning does well
Dermaplaning is exfoliation and hair removal in one pass. In Cleveland Clinic’s guide to dermaplaning at home, dermatologist Melissa Piliang, MD, describes it as taking dead skin cells and peach fuzz off the surface of the skin, which is why products may absorb better and makeup may go on more smoothly afterward. Her guidance on frequency is no more than once a week, so skin has time to recover.
The limits are just as clear. The same guidance says to wait out a breakout, because dermaplaning can aggravate existing acne, and to skip it during an eczema flare or any other active skin issue. Skin may feel a little irritated for a day or so, and a nick is a way in for infection, so a guarded tool beats a bare blade.
The dermaplaning tool to look at
What works here is a sonic tool with a safety guard over the blade. The Michael Todd Sonicsmooth is the pick for most people: the brand lists sonic technology with three speeds and a patented safety guard, and says it removes peach fuzz and sideburns. Shop the Michael Todd Sonicsmooth.
Waxing wins on staying power. Because the hair comes out at the root, one session can last three to four weeks, according to Cleveland Clinic dermatologist Shilpi Khetarpal, MD. That makes it the stronger choice for dark, coarse hairs, the kind that show again quickly when they are only cut at the surface.
The trade-offs are the grow-out and the skin stress. Hair has to be about one-fourth to three-fourths of an inch long before wax can grip it, per the American Academy of Dermatology, so there is always a stretch of visible regrowth between sessions. Cleveland Clinic also lists inflamed follicles, redness, ingrown hairs, and irritation as possible side effects.
The rules dermatologists set for waxing your face
Pause retinol and prescription retinoids first. The American Academy of Dermatology says to avoid them for two to five days before waxing your face. Cleveland Clinic warns that waxing retinol-affected skin can cause abrasions, infection, and even scarring.
No waxing within six months of isotretinoin. That one comes straight from the American Academy of Dermatology.
Skip sunburned or very sensitive skin.
Watch the aftermath. If redness or swelling lasts more than two days, the Academy says to see a dermatologist.
The wax to look at
For a first try at home, the move is no-heat strips made for the face, since there is no hot wax to overheat. Nad’s Facial Wax Strips come as a kit with 20 strips, four calming oil wipes, and a skin protection powder, and the brand lists them for the face, chin, and upper lip. Nad’s also says not to wax the same facial area twice, because repeat passes can irritate delicate skin. See Nad’s Facial Wax Strips on Amazon.
Which one to pick, by situation
Light fuzz across the whole face: dermaplaning. It covers a large area gently, and there is nothing to grow out.
A few dark hairs on the upper lip or chin: waxing, for the weeks between sessions.
Makeup prep before an event: dermaplaning, done a day or two ahead in case skin feels irritated.
Retinol or tretinoin in your routine: waxing is the one with the formal warning and the two to five day pause. For timing actives around a dermaplaning session, see what to use after dermaplaning.
Active breakouts or an eczema flare: wait. Dermaplaning is off the table until skin calms down, and the American Academy of Dermatology says not to wax very sensitive skin.
No. Mayo Clinic states that shaving does not change hair’s thickness, color, or rate of growth. What changes is the tip: a cut hair has a blunt end, so it can feel coarser or look more noticeable while it grows out. Dr. Piliang makes the same point about dermaplaning. With waxing, Cleveland Clinic notes that hair can grow back thinner over time. More myths are covered in dermaplaning mistakes and side effects.
Can you do both?
Yes, on different areas. The split that makes sense is waxing the upper lip and chin and dermaplaning the cheeks, jaw, and forehead. The caution is not to stack them on the same patch of skin in one session, since both take off surface skin. And remember the grow-out: dermaplaning an area resets the clock on the length wax needs.
Want longer between sessions? Where at-home IPL fits
Dermaplaning and waxing are both temporary. For dark facial hair that keeps coming back, at-home IPL is the next step up, and the one to look at is the Nood Flasher Pro. Nood says it can be used anywhere on the face or body, except the eyebrows and the area immediately around the eyes, and lists it for black, brown, and dark blonde hair on fair to olive skin (Fitzpatrick I to IV). Check the Nood Flasher Pro on Amazon.
Two things to know before switching. First, Nood says IPL does not work on light blonde hair, so pale peach fuzz stays in dermaplaning territory. Second, Nood says to shave before each session and not to wax, pluck, thread, or epilate, because IPL needs the hair follicle intact. Waxing and IPL do not mix. The side by side on devices is in Nood Flasher Pro vs other IPL hair removal devices.
The verdict
Pick dermaplaning if the goal is a fuzz-free, smoother face with no grow-out and no sting. Pick waxing if the hair is dark or coarse and three to four weeks between sessions matters more than comfort. Look at IPL if you are tired of repeating either one.
For fine peach fuzz, yes: there is no sting, it exfoliates, and it needs no grow-out. For dark or coarse hair, waxing is better because it removes the root and lasts about three to four weeks.
Which lasts longer, dermaplaning or waxing?
Waxing. One session can last three to four weeks, per Cleveland Clinic. Dermaplaning cuts hair at the surface, so regrowth shows sooner, and it can be repeated as often as once a week.
Is waxing or dermaplaning better for the upper lip?
It depends on the hair. Dark, coarse upper lip hair is a waxing job. Fine, light fuzz is easier and gentler to dermaplane.
Can you dermaplane after waxing?
Not on the same area in the same session. Let waxed skin settle fully first, and keep in mind that wax needs about a quarter inch of growth, so dermaplaning a waxed area pushes back the next wax.
Does hair grow back thicker after dermaplaning or waxing?
No. Mayo Clinic says cutting hair does not change its thickness, color, or rate of growth. A blunt tip can feel coarser for a while, and that is all.
Can you wax your face if you use retinol?
Not without a pause. The American Academy of Dermatology says to stop retinol and prescription retinoids two to five days before waxing your face, and not to wax at all within six months of taking isotretinoin.
Sources: Cleveland Clinic, Is It OK To Try Dermaplaning at Home? (Melissa Piliang, MD) and Shaving vs. Waxing: Benefits, Cons and Results (Shilpi Khetarpal, MD). American Academy of Dermatology, Hair Removal: How to Wax. Mayo Clinic expert answer on shaving and hair regrowth. Michael Todd Beauty, Dermaflash, Nad’s, and Nood product pages, checked October 2026. This post is general information, not medical advice. Talk to a dermatologist about your own skin.
Last updated: June 5, 2026 · By Anna Katherine Page
This post contains affiliate links. If you buy through them I may earn a small commission, at no extra cost to you. I only recommend products I actually use. This is not medical advice; consult a dermatologist for any skin concerns.
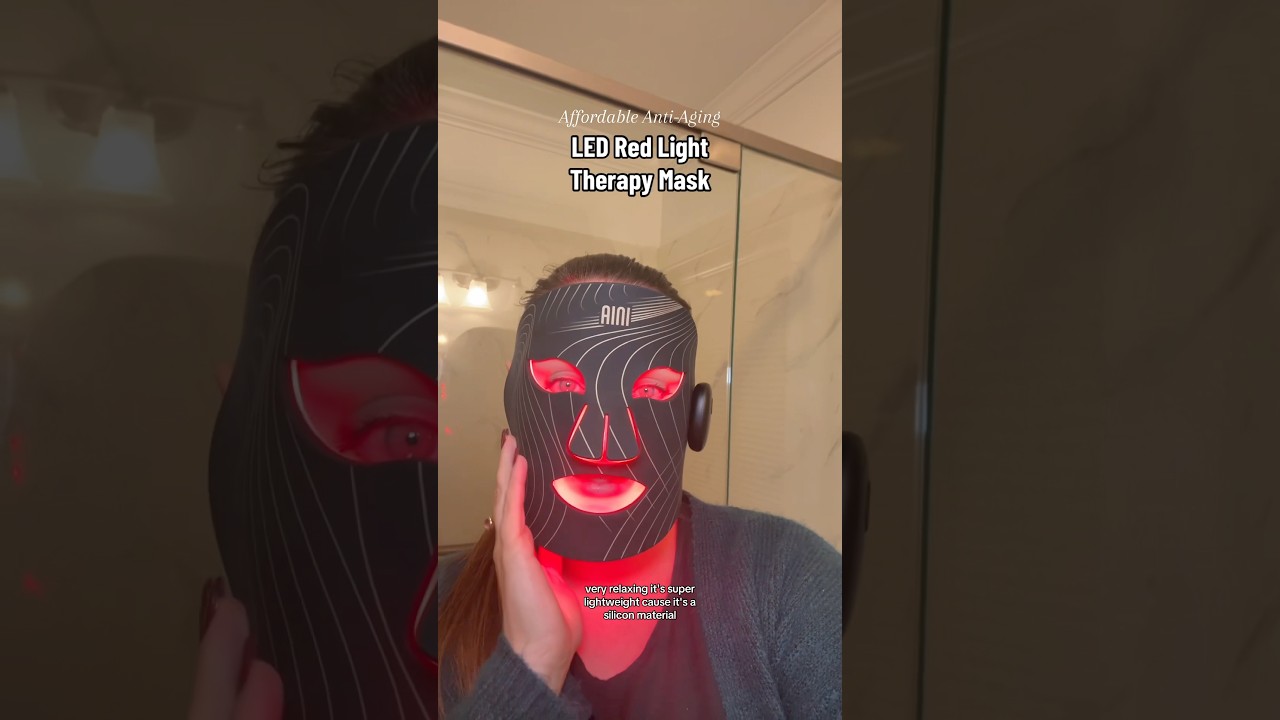
Quick answer: An LED light therapy mask builds collagen at home, which is something Botox does not actually do. I use a wireless silicone mask with red, blue, purple, and yellow light for about 10 minutes before bed. It is peaceful, takes no real effort, and the results show up gradually in the skin.
If you have been looking at every LED light therapy mask on the internet trying to figure out which one is worth the money, here is mine. I picked a wireless silicone option with more LEDs and more color modes than the top-of-the-list competitors, and I use it for ten minutes most nights. This LED light therapy mask review covers why I chose this style, what to look for if you are shopping, and how I actually use it at home.
Why an LED light therapy mask over other anti-aging tools
Here is the thing nobody talks about enough: Botox does not build collagen. It relaxes specific facial muscles to soften wrinkles, but it does nothing to actually strengthen the skin underneath. An LED light therapy mask works in the opposite direction. Red wavelengths of light penetrate the skin and stimulate the cells that produce collagen, the structural protein that keeps skin firm and bouncy. For at-home daily use, that is a real point of difference. You are investing ten minutes a day in something that supports the long game of skin health, not a quarterly appointment that smooths the surface.
What to look for in an LED light therapy mask
If you are shopping right now, these are the features that made me settle on mine instead of the popular ones every dermatologist seems to be paid to mention.
Wireless and rechargeable. No cord to dodge while you are trying to relax.
Silicone construction. It contours to your face comfortably and lets you wear it while lying down without a hard plastic shell pressing in.
Multiple light colors. Different wavelengths target different things. A mask with red, blue, purple, and yellow gives you flexibility from one tool.
More LEDs and better coverage. The number of individual LEDs across the mask matters. More lights means more even exposure, especially around the cheeks and forehead.
Built-in timer. Most quality masks auto-shut off around 10 minutes, which is the standard treatment window.
Adjustable strap. You want it secure enough to wear hands-free.
A good LED light therapy mask gives you several color modes, each one targeting something different. Here is the short version of what each color is generally used for in at-home skincare:
Red light. The collagen builder. The wavelength most associated with anti-aging and firming.
Blue light. Targets the bacteria associated with breakouts, often used by people with acne-prone skin.
Purple light. A blend of red and blue, useful when you want both anti-aging and clearing in one session.
Yellow light. Often used for tone and to soothe the look of redness.
Most nights I run mine on red because building collagen is the main goal for my skin right now. The color flexibility is part of why I wanted a multi-mode mask rather than a single-color version.
How I use my LED light therapy mask
Cleanse first. A clean face lets the light reach the skin without makeup or sunscreen blocking it.
Put the mask on and secure the strap. The silicone shapes to your face.
Choose your color. Mostly red for me.
Set it and lie down. Ten minutes. The mask shuts off automatically when the session is done.
Use the time to wind down. Most evenings I do this right before bed. It is quiet, your eyes are protected, and it doubles as a ritual that signals the day is closing.
Finish with your usual serum and moisturizer. Skincare goes on after, when the skin is warm and receptive.
What to expect from your results
The honest answer: gradual. LED light therapy is not a one-session miracle. Consistency over weeks and months is what produces visible difference. The first thing most people notice is a smoother look to the skin and a gradual brightening. Texture changes follow. None of this replaces a real skincare routine; what it does is amplify the work the rest of your routine is already doing, by giving the cells underneath more of the building blocks they need.
Key takeaways
An LED light therapy mask uses red light to build collagen, which Botox does not do.
Look for wireless, silicone, multi-color, with enough LEDs for even coverage.
Ten minutes a night, often before bed, is the standard session.
Results are gradual; consistency over months is the rule.
Frequently asked questions
Does an LED light therapy mask actually build collagen?
Red wavelengths of LED light are associated with stimulating the cells that produce collagen, the structural protein that keeps skin firm. Effects build over consistent use rather than from a single session.
How often should I use an LED light therapy mask?
Most home users run a session 3 to 5 times a week, with each session around 10 minutes. Some users do it daily. Consistency is the most important variable.
Is an LED light therapy mask safe to use at home?
At-home LED masks are designed to be safe for daily use, with built-in timers and eye coverage. If you have sensitive skin, are pregnant, or are on photosensitizing medications, check with a dermatologist before starting.
Should I use my LED light therapy mask on clean skin or with skincare on?
Clean, dry skin. Makeup, sunscreen, and most serums can block the light from reaching your skin. Apply your products after the session, when skin is warm.
What color of light should I use most?
For most adults focused on anti-aging, red is the default. Blue gets attention from people targeting breakouts. Many masks let you cycle through.
How long until I see results from an LED light therapy mask?
Visible results typically build over weeks to a few months of consistent use. The earliest changes tend to be smoothness and brightness, with texture changes following.
About Anna Katherine
I share the real version of building a home, a small business, and a skincare routine on a budget. Honest reviews, no sponsored hype. Follow on TikTok and YouTube.