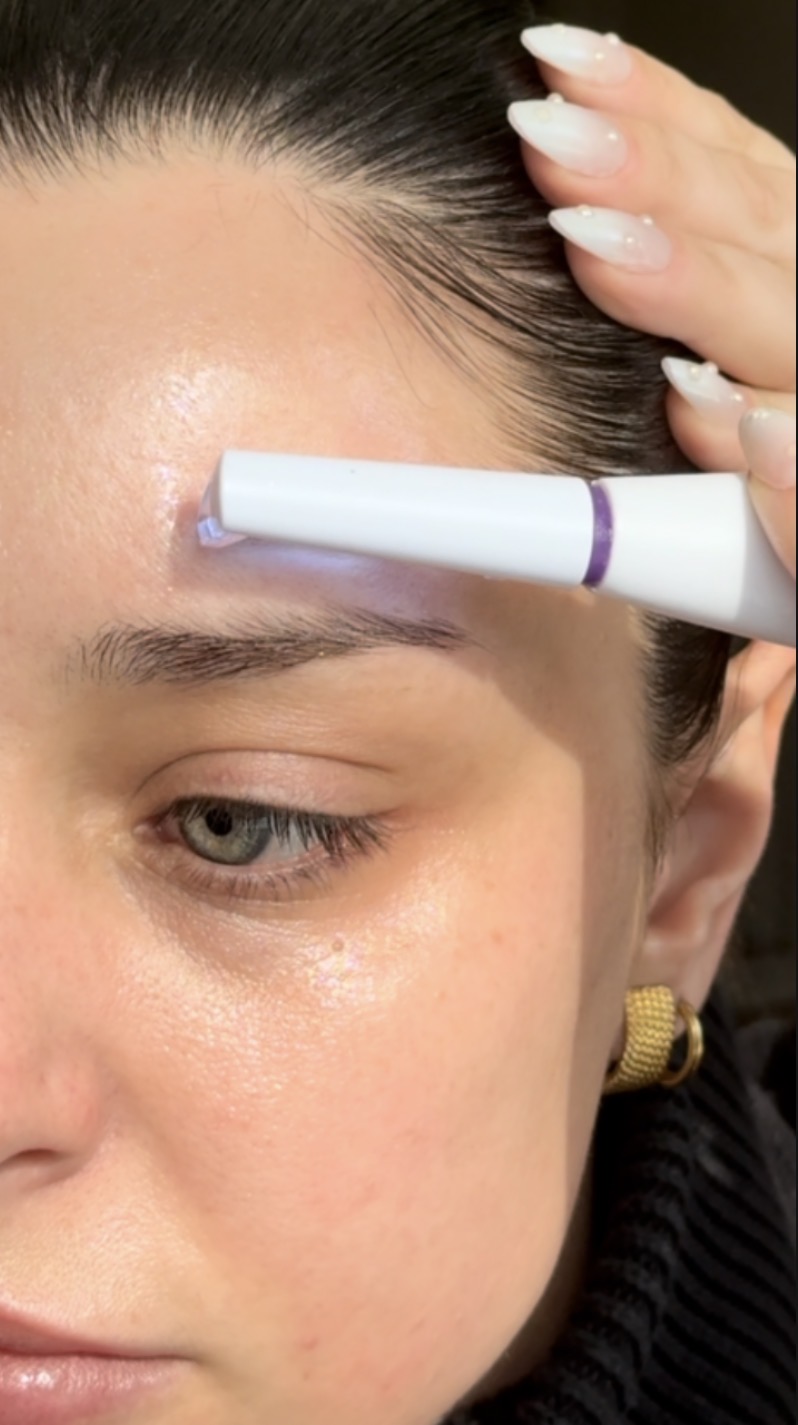
Here is how to use the Michael Todd microdermabrasion tip: swap the dermaplaning blade on your Sonicsmooth for a Microsmooth diamond tip, cleanse and dry your face, pick a speed, hold the tip at a 45 degree angle starting near the hairline, and make short strokes that follow the contours of your face, one to three passes per area. Michael Todd Beauty recommends it once a week, as an in-between step a few days after your weekly dermaplaning session, not on the same day. If you want microdermabrasion with suction and pore extraction instead of a tip on your dermaplaning tool, that is a different device, the Sonic Refresher, covered further down.
What it is: Microsmooth is a diamond microdermabrasion tip that attaches to the Sonicsmooth in place of the blade. It buffs away dead skin with fine diamond particles and uses sonic vibration rather than suction.
Where to get it: two Microsmooth tips come in the box with the Sonicsmooth Pro+, and replacement two-packs are sold separately.
How often: once a week, as the brand puts it, an intermediate treatment between weekly Sonicsmooth sessions.
How: clean, dry skin, 45 degree angle, short strokes along the contours, one to three passes per area, then serum or moisturizer.
Not the same as the Sonic Refresher: that is Michael Todd’s standalone wet/dry microdermabrasion system with suction pore extraction and a mist. Different device, different steps.
Which Michael Todd microdermabrasion do you have?
Searches for “Michael Todd microdermabrasion” can mean either of two products, and the instructions are not interchangeable. Check this first.
Microsmooth tip
Sonic Refresher
What it is
A diamond microdermabrasion tip for the Sonicsmooth dermaplaning device
A standalone wet/dry sonic microdermabrasion and pore extraction system
How it exfoliates
Laser-cut diamond bits with sonic vibration, no suction
Diamond heads plus vacuum suction
Heads
One tip that swaps in for the blade, sold in two-packs
Coarse, fine and small fine diamond heads, plus three pore extraction heads
Extras
None, it rides on the Sonicsmooth
Nano mist for water or toner, 40 disposable filters, charging cradle
Speeds
The Sonicsmooth’s 3 speeds
Multiple speeds shown on an LCD
Brand’s frequency
Once a week, between weekly dermaplaning sessions
Once a week
Where it sells
In the Sonicsmooth Pro+ box, and as a two-pack on Amazon
Michael Todd Beauty’s own site
Best for
Anyone who already dermaplanes with a Sonicsmooth
Anyone who wants pore extraction and does not dermaplane
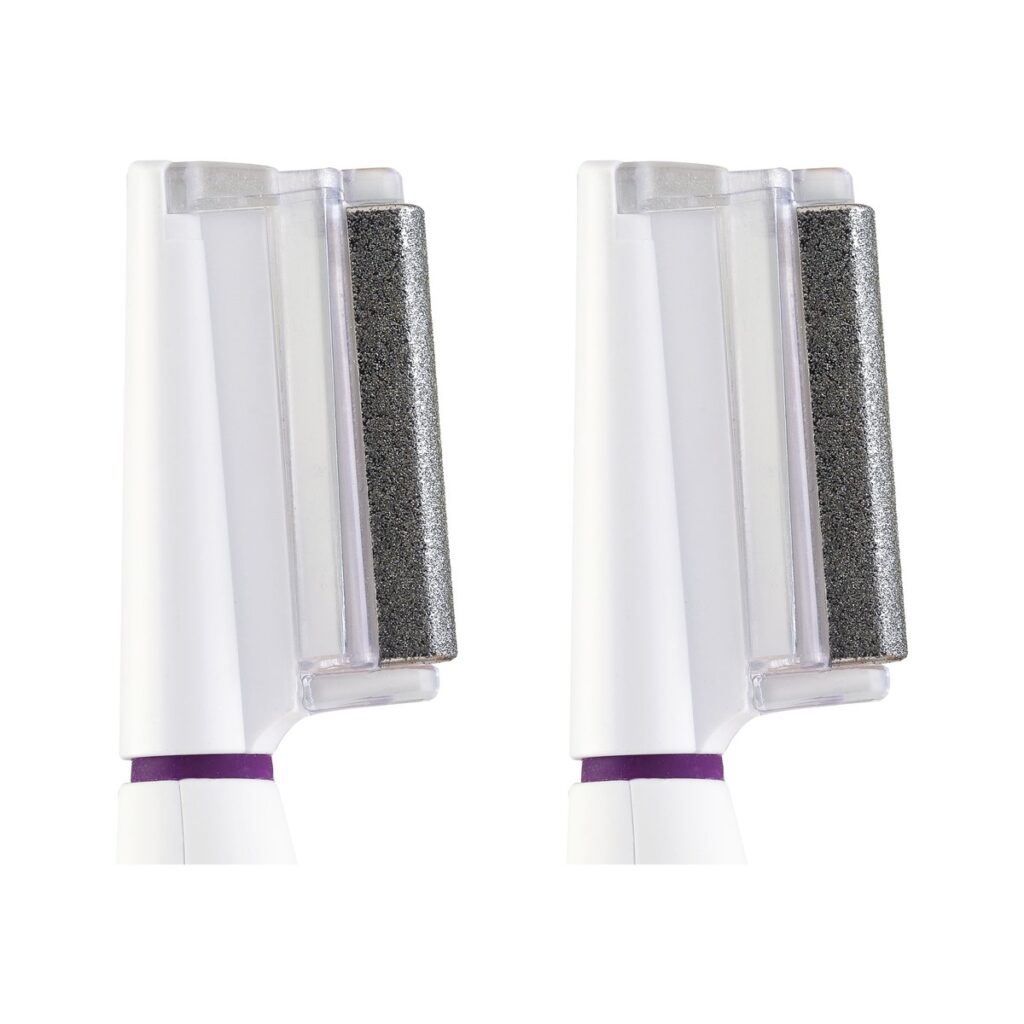
If you already own a Sonicsmooth Pro+, look in the box before you buy anything. The two Microsmooth tips are the small diamond-coated heads packed alongside the 16 dermaplaning blades.
The Microsmooth tips: diamond-coated heads that go on the Sonicsmooth in place of the blade. Image: Michael Todd Beauty.
How to use the Microsmooth microdermabrasion tip, step by step
Swap the blade for the tip. Remove the dermaplaning blade from the Sonicsmooth and attach a Microsmooth tip in its place. Make sure it is firmly seated before you turn the device on.
Cleanse with an oil-free cleanser. Rinse well and pat your face completely dry. The tip works on bare, dry skin, so skip oils and serums until the end.
Pick a speed. The Sonicsmooth has three. Start on the lowest setting the first few times and move up only if your skin is comfortable.
Hold the tip at a 45 degree angle. Start near the hairline and work down the face in sections.
Use short strokes that follow your contours. Forehead, cheeks, along the jaw and chin. Keep the tip moving and let it glide rather than pressing it in.
One to three passes per area. That is the brand’s range. One pass is plenty for a first session.
Follow with serum or moisturizer. Freshly exfoliated skin is the point where your skincare goes on most evenly. The Pro+ listing also advises holding off on makeup right after using the device.
Clean the tip. Take it off the device, rinse it under warm water, and let it air dry before you put it away.
The blade and the diamond tip do different jobs. The blade shaves off peach fuzz and the top layer of dead skin. The Microsmooth tip only buffs. Michael Todd Beauty positions Microsmooth as the step in between weekly Sonicsmooth sessions, and its how-to page suggests using the Microsmooth tips two to three days after you dermaplane. Its support article puts the Microsmooth frequency at once a week.
A simple rhythm that follows the brand’s guidance:
Do not stack both on the same day. Two exfoliating steps back to back is the fastest way to end up red and tight. If your skin still feels sensitive from dermaplaning, skip the Microsmooth that week.
The video below walks through the Sonicsmooth Pro+ dermaplaning routine that the Microsmooth step builds on.
At Home Dermaplane Tutorial Using Michael Todd Beauty Sonicsmooth Pro+
Who should go slow or skip it
Sensitive skin: the brand says Microsmooth suits all skin types, including sensitive skin, and that the speed setting lets you adjust the intensity. The move is the lowest speed and a single pass.
Irritated, broken or sunburned skin, or an active breakout: work around those areas or wait until they settle.
A skin condition or prescription skincare: check with a dermatologist before adding any exfoliating tool. Michael Todd’s own Sonic Refresher guide says the same for anyone under a doctor’s care for a skin condition or with very sensitive skin.
How to use the Michael Todd Sonic Refresher instead
If the device in your hands has a mist reservoir and suction heads, it is the Sonic Refresher. The quick start guide lays out a five-step routine, each step using the same glide technique.
Prep: charge it fully before the first use, test on a small area, cleanse and pat dry, and put a new disposable filter under the head.
Renew, coarse tip: short upward and outward strokes on the face. Keep it away from the thin skin around the eyes and lips.
Reset, small tip: the tight spots, around the nose, mouth lines, crow’s feet, between the brows and the forehead.
Refine, fine tip: a final polish before skincare or makeup.
Remove, pore extraction tip: suction lifts out congestion. Keep it moving the whole time.
Rehydrate: fill the reservoir with water or toner and mist. No oil-based products in the mister.
Technique for every step: work in one to two inch sections, hold the skin taut with your free hand, start on low speed, and begin with two to four passes, moving up to four to six once your skin is used to it. Never hold it still on one spot. The brand’s support article puts the Sonic Refresher at once a week. The guide also notes the device contains magnets, so keep it away from pacemakers and other implanted devices.
The Sonic Refresher does not show up on Amazon. It sells on Michael Todd Beauty’s site, with a 30-day money-back guarantee and a 3-year warranty listed on the page.
Which one to buy
You want dermaplaning and microdermabrasion in one tool: the Sonicsmooth Pro+. The two Microsmooth tips are already in the box. See the Sonicsmooth Pro+ on Amazon.
How do you use the Michael Todd microdermabrasion tip?
Swap the blade on your Sonicsmooth for a Microsmooth tip, cleanse with an oil-free cleanser and pat dry, choose a speed, then hold the tip at a 45 degree angle starting near the hairline and make short strokes along the contours of your face, one to three passes per area. Finish with serum or moisturizer.
How often can you use Michael Todd microdermabrasion?
Michael Todd Beauty recommends once a week for both the Microsmooth tip and the Sonic Refresher. For Microsmooth, the brand places it between weekly dermaplaning sessions, a few days after you use the blade.
Can you dermaplane and use the Microsmooth tip on the same day?
The brand frames Microsmooth as an in-between treatment, and its how-to page suggests the tips two to three days after dermaplaning. Spacing them out keeps you from exfoliating twice in one session.
Does the Sonicsmooth Pro+ come with microdermabrasion tips?
Yes. The Pro+ listing includes 16 dermaplaning blades and 2 Microsmooth exfoliation tips. Replacement Microsmooth tips are sold in two-packs.
Is Michael Todd microdermabrasion safe for sensitive skin?
The brand says both Microsmooth and the Sonic Refresher suit all skin types, including sensitive skin, with speed settings to adjust intensity. Start on the lowest speed with a single pass. If you have a skin condition or very sensitive skin, check with a dermatologist first.
How do you clean the Microsmooth tip?
Remove it from the device, rinse it under warm water after every use, and let it air dry.
Last updated: June 5, 2026 · By Anna Katherine Page
This post contains affiliate links. If you buy through them I may earn a small commission, at no extra cost to you. I only recommend products I actually use. This is not medical advice; consult a dermatologist for any skin concerns.
Quick answer: An LED light therapy mask builds collagen at home, which is something Botox does not actually do. I use a wireless silicone mask with red, blue, purple, and yellow light for about 10 minutes before bed. It is peaceful, takes no real effort, and the results show up gradually in the skin.
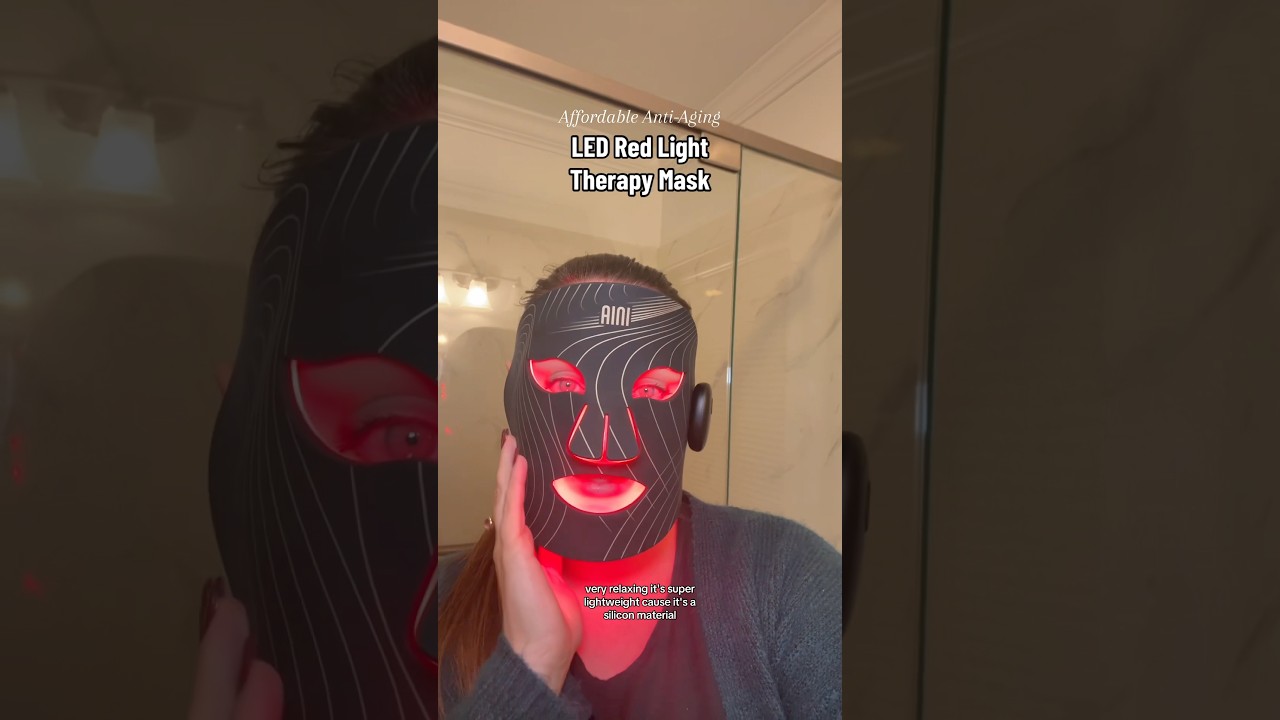
If you have been looking at every LED light therapy mask on the internet trying to figure out which one is worth the money, here is mine. I picked a wireless silicone option with more LEDs and more color modes than the top-of-the-list competitors, and I use it for ten minutes most nights. This LED light therapy mask review covers why I chose this style, what to look for if you are shopping, and how I actually use it at home.
Why an LED light therapy mask over other anti-aging tools
Here is the thing nobody talks about enough: Botox does not build collagen. It relaxes specific facial muscles to soften wrinkles, but it does nothing to actually strengthen the skin underneath. An LED light therapy mask works in the opposite direction. Red wavelengths of light penetrate the skin and stimulate the cells that produce collagen, the structural protein that keeps skin firm and bouncy. For at-home daily use, that is a real point of difference. You are investing ten minutes a day in something that supports the long game of skin health, not a quarterly appointment that smooths the surface.
What to look for in an LED light therapy mask
If you are shopping right now, these are the features that made me settle on mine instead of the popular ones every dermatologist seems to be paid to mention.
Wireless and rechargeable. No cord to dodge while you are trying to relax.
Silicone construction. It contours to your face comfortably and lets you wear it while lying down without a hard plastic shell pressing in.
Multiple light colors. Different wavelengths target different things. A mask with red, blue, purple, and yellow gives you flexibility from one tool.
More LEDs and better coverage. The number of individual LEDs across the mask matters. More lights means more even exposure, especially around the cheeks and forehead.
Built-in timer. Most quality masks auto-shut off around 10 minutes, which is the standard treatment window.
Adjustable strap. You want it secure enough to wear hands-free.
A good LED light therapy mask gives you several color modes, each one targeting something different. Here is the short version of what each color is generally used for in at-home skincare:
Red light. The collagen builder. The wavelength most associated with anti-aging and firming.
Blue light. Targets the bacteria associated with breakouts, often used by people with acne-prone skin.
Purple light. A blend of red and blue, useful when you want both anti-aging and clearing in one session.
Yellow light. Often used for tone and to soothe the look of redness.
Most nights I run mine on red because building collagen is the main goal for my skin right now. The color flexibility is part of why I wanted a multi-mode mask rather than a single-color version.
How I use my LED light therapy mask
Cleanse first. A clean face lets the light reach the skin without makeup or sunscreen blocking it.
Put the mask on and secure the strap. The silicone shapes to your face.
Choose your color. Mostly red for me.
Set it and lie down. Ten minutes. The mask shuts off automatically when the session is done.
Use the time to wind down. Most evenings I do this right before bed. It is quiet, your eyes are protected, and it doubles as a ritual that signals the day is closing.
Finish with your usual serum and moisturizer. Skincare goes on after, when the skin is warm and receptive.
What to expect from your results
The honest answer: gradual. LED light therapy is not a one-session miracle. Consistency over weeks and months is what produces visible difference. The first thing most people notice is a smoother look to the skin and a gradual brightening. Texture changes follow. None of this replaces a real skincare routine; what it does is amplify the work the rest of your routine is already doing, by giving the cells underneath more of the building blocks they need.
Key takeaways
An LED light therapy mask uses red light to build collagen, which Botox does not do.
Look for wireless, silicone, multi-color, with enough LEDs for even coverage.
Ten minutes a night, often before bed, is the standard session.
Results are gradual; consistency over months is the rule.
Frequently asked questions
Does an LED light therapy mask actually build collagen?
Red wavelengths of LED light are associated with stimulating the cells that produce collagen, the structural protein that keeps skin firm. Effects build over consistent use rather than from a single session.
How often should I use an LED light therapy mask?
Most home users run a session 3 to 5 times a week, with each session around 10 minutes. Some users do it daily. Consistency is the most important variable.
Is an LED light therapy mask safe to use at home?
At-home LED masks are designed to be safe for daily use, with built-in timers and eye coverage. If you have sensitive skin, are pregnant, or are on photosensitizing medications, check with a dermatologist before starting.
Should I use my LED light therapy mask on clean skin or with skincare on?
Clean, dry skin. Makeup, sunscreen, and most serums can block the light from reaching your skin. Apply your products after the session, when skin is warm.
What color of light should I use most?
For most adults focused on anti-aging, red is the default. Blue gets attention from people targeting breakouts. Many masks let you cycle through.
How long until I see results from an LED light therapy mask?
Visible results typically build over weeks to a few months of consistent use. The earliest changes tend to be smoothness and brightness, with texture changes following.
About Anna Katherine
I share the real version of building a home, a small business, and a skincare routine on a budget. Honest reviews, no sponsored hype. Follow on TikTok and YouTube.
Disclosure: This post contains affiliate links, which means I may earn a small commission if you make a purchase through my links, at no extra cost to you.
Quick answer: Poshmamma’s anti aging glow up skincare recipe is a two ingredient DIY, vitamin E oil combined with an essential oil, applied to the face. I tried it after watching her results on TikTok and wrote up honestly what happened on my own skin. This is a cosmetic routine, not a treatment.
Poshmamma’s Anti Aging Glow Up Skincare Recipe That Actually Works
This anti aging glow up skincare recipe uses just two powerful ingredients to transform your skin. According to the American Academy of Dermatology, vitamin E and essential oils are among the most effective natural anti-aging ingredients. I tried Poshmamma’s viral anti aging glow up skincare recipe and here are my honest results.
This post may contain affiliate links. I may earn a small commission at no extra cost to you if you make a purchase through these links. I only recommend products I personally use and love.
I’ve found a new anti aging glow up skincare recipe that I’m going to be trying out that I recently discovered from someone on TikTok. Her username is @Poshmamma and here is one of the videos where she introduces us to the 2 holy grail all-natural products that give her this phenomenal glow. This woman is really extraordinary when it comes to giving tips on how to utilize the resources that Earth gives us to heal our bodies and, in this scenario, to make our skin glow & repair the effects of aging. Poshmamma is in her early 50s, I believe, and I noticed in her videos that recently she has been doing something to her skin. The results have been visibly noticeable by not just me but some of her other followers on TikTok as well. In a matter of only 1-2 weeks, this lady’s skin has turned from night to day. Her results had me immediately convinced to try whatever she was doing. So of course, I quite literally ran to Wal-Mart and I bought her skin recipe concoction to test it out for myself.
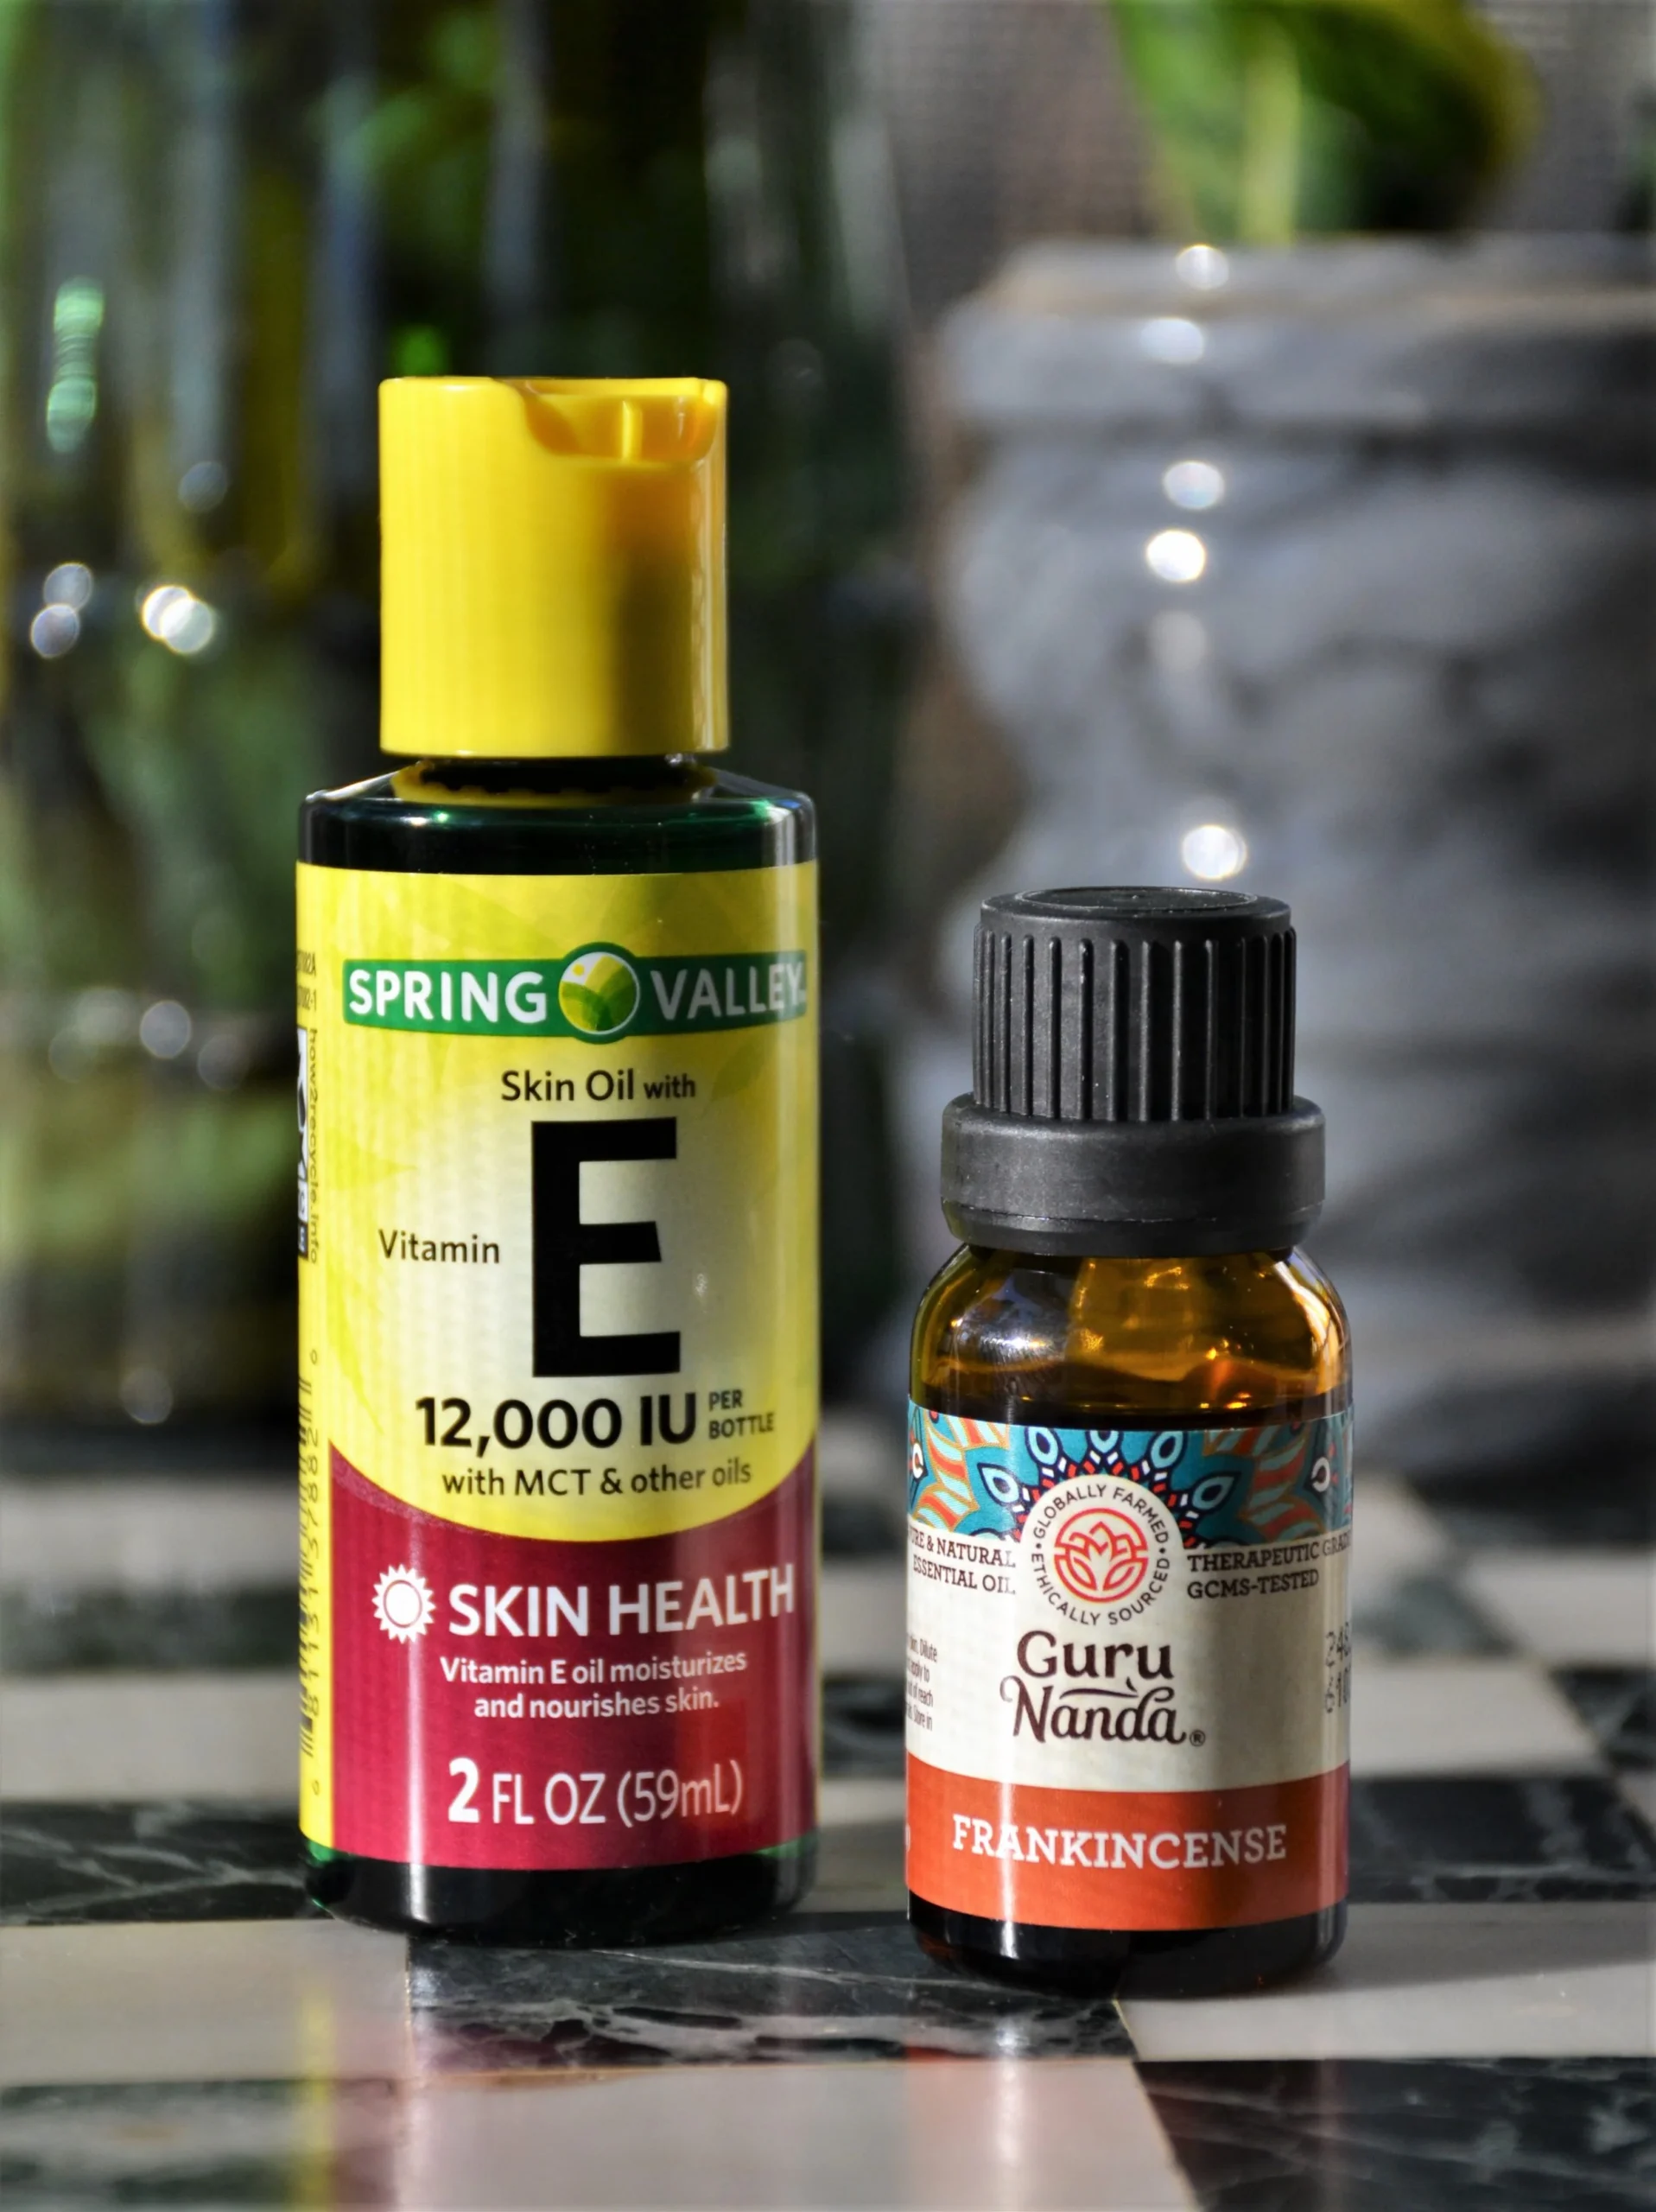
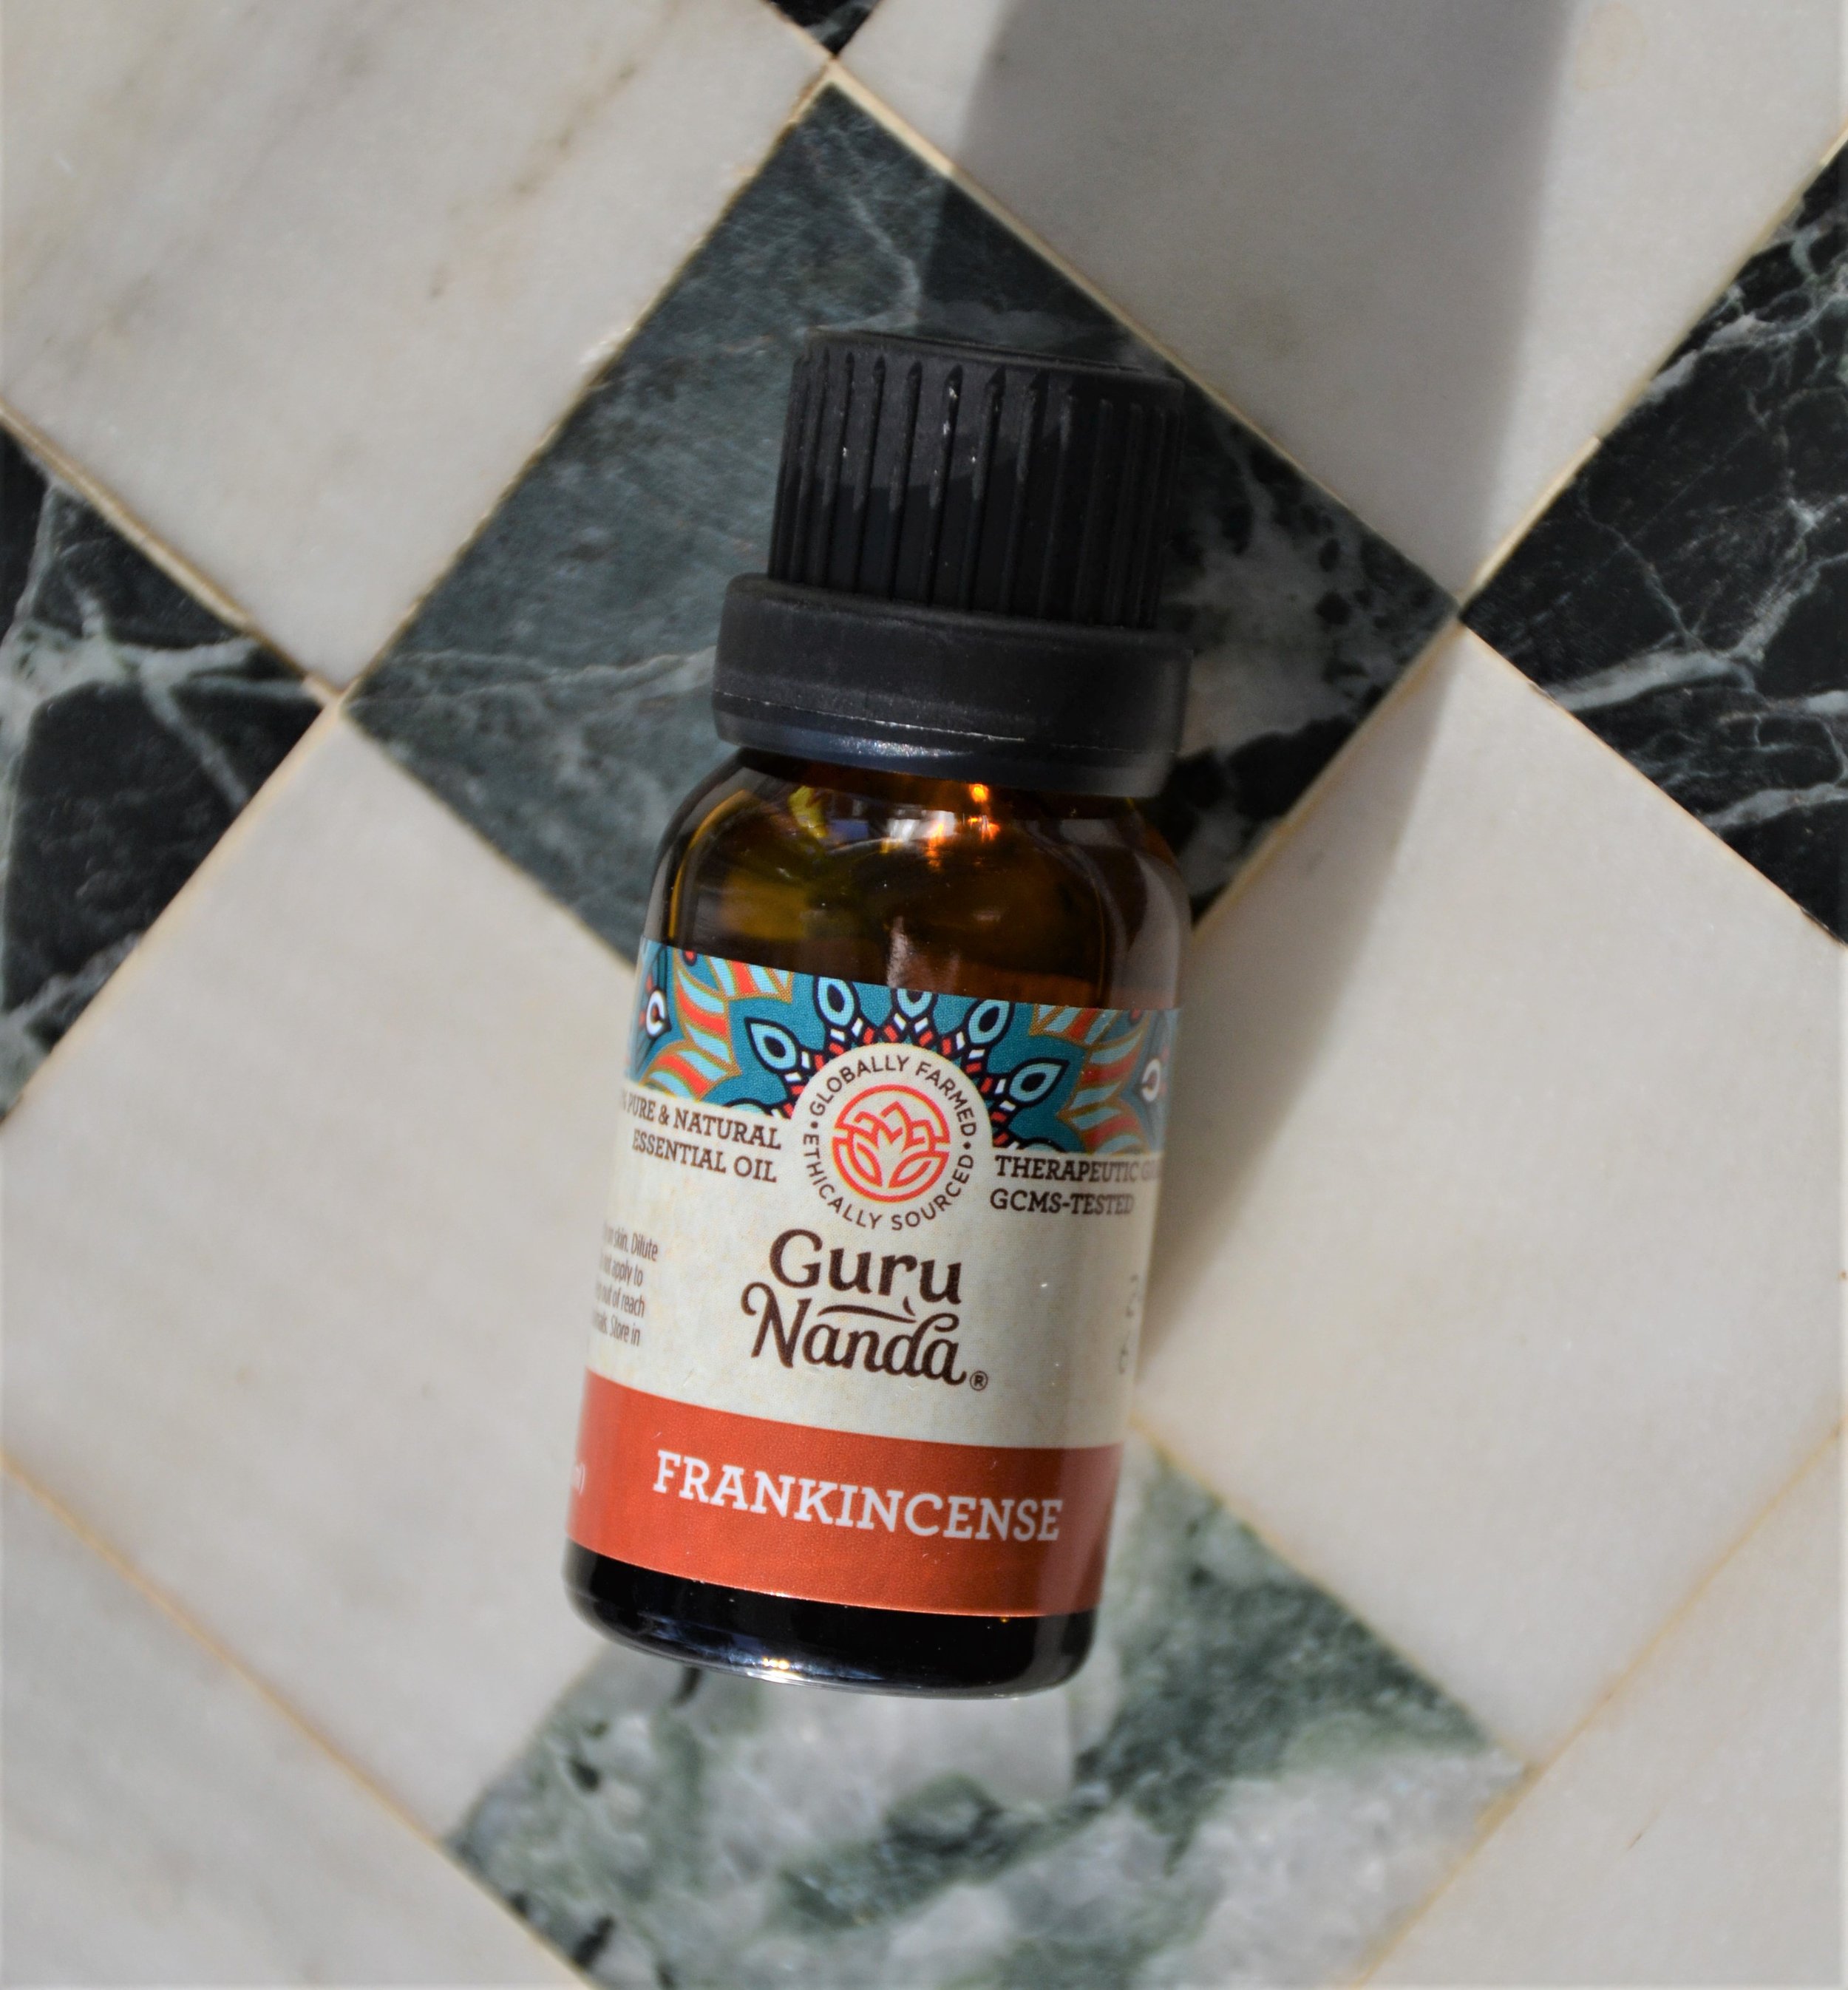
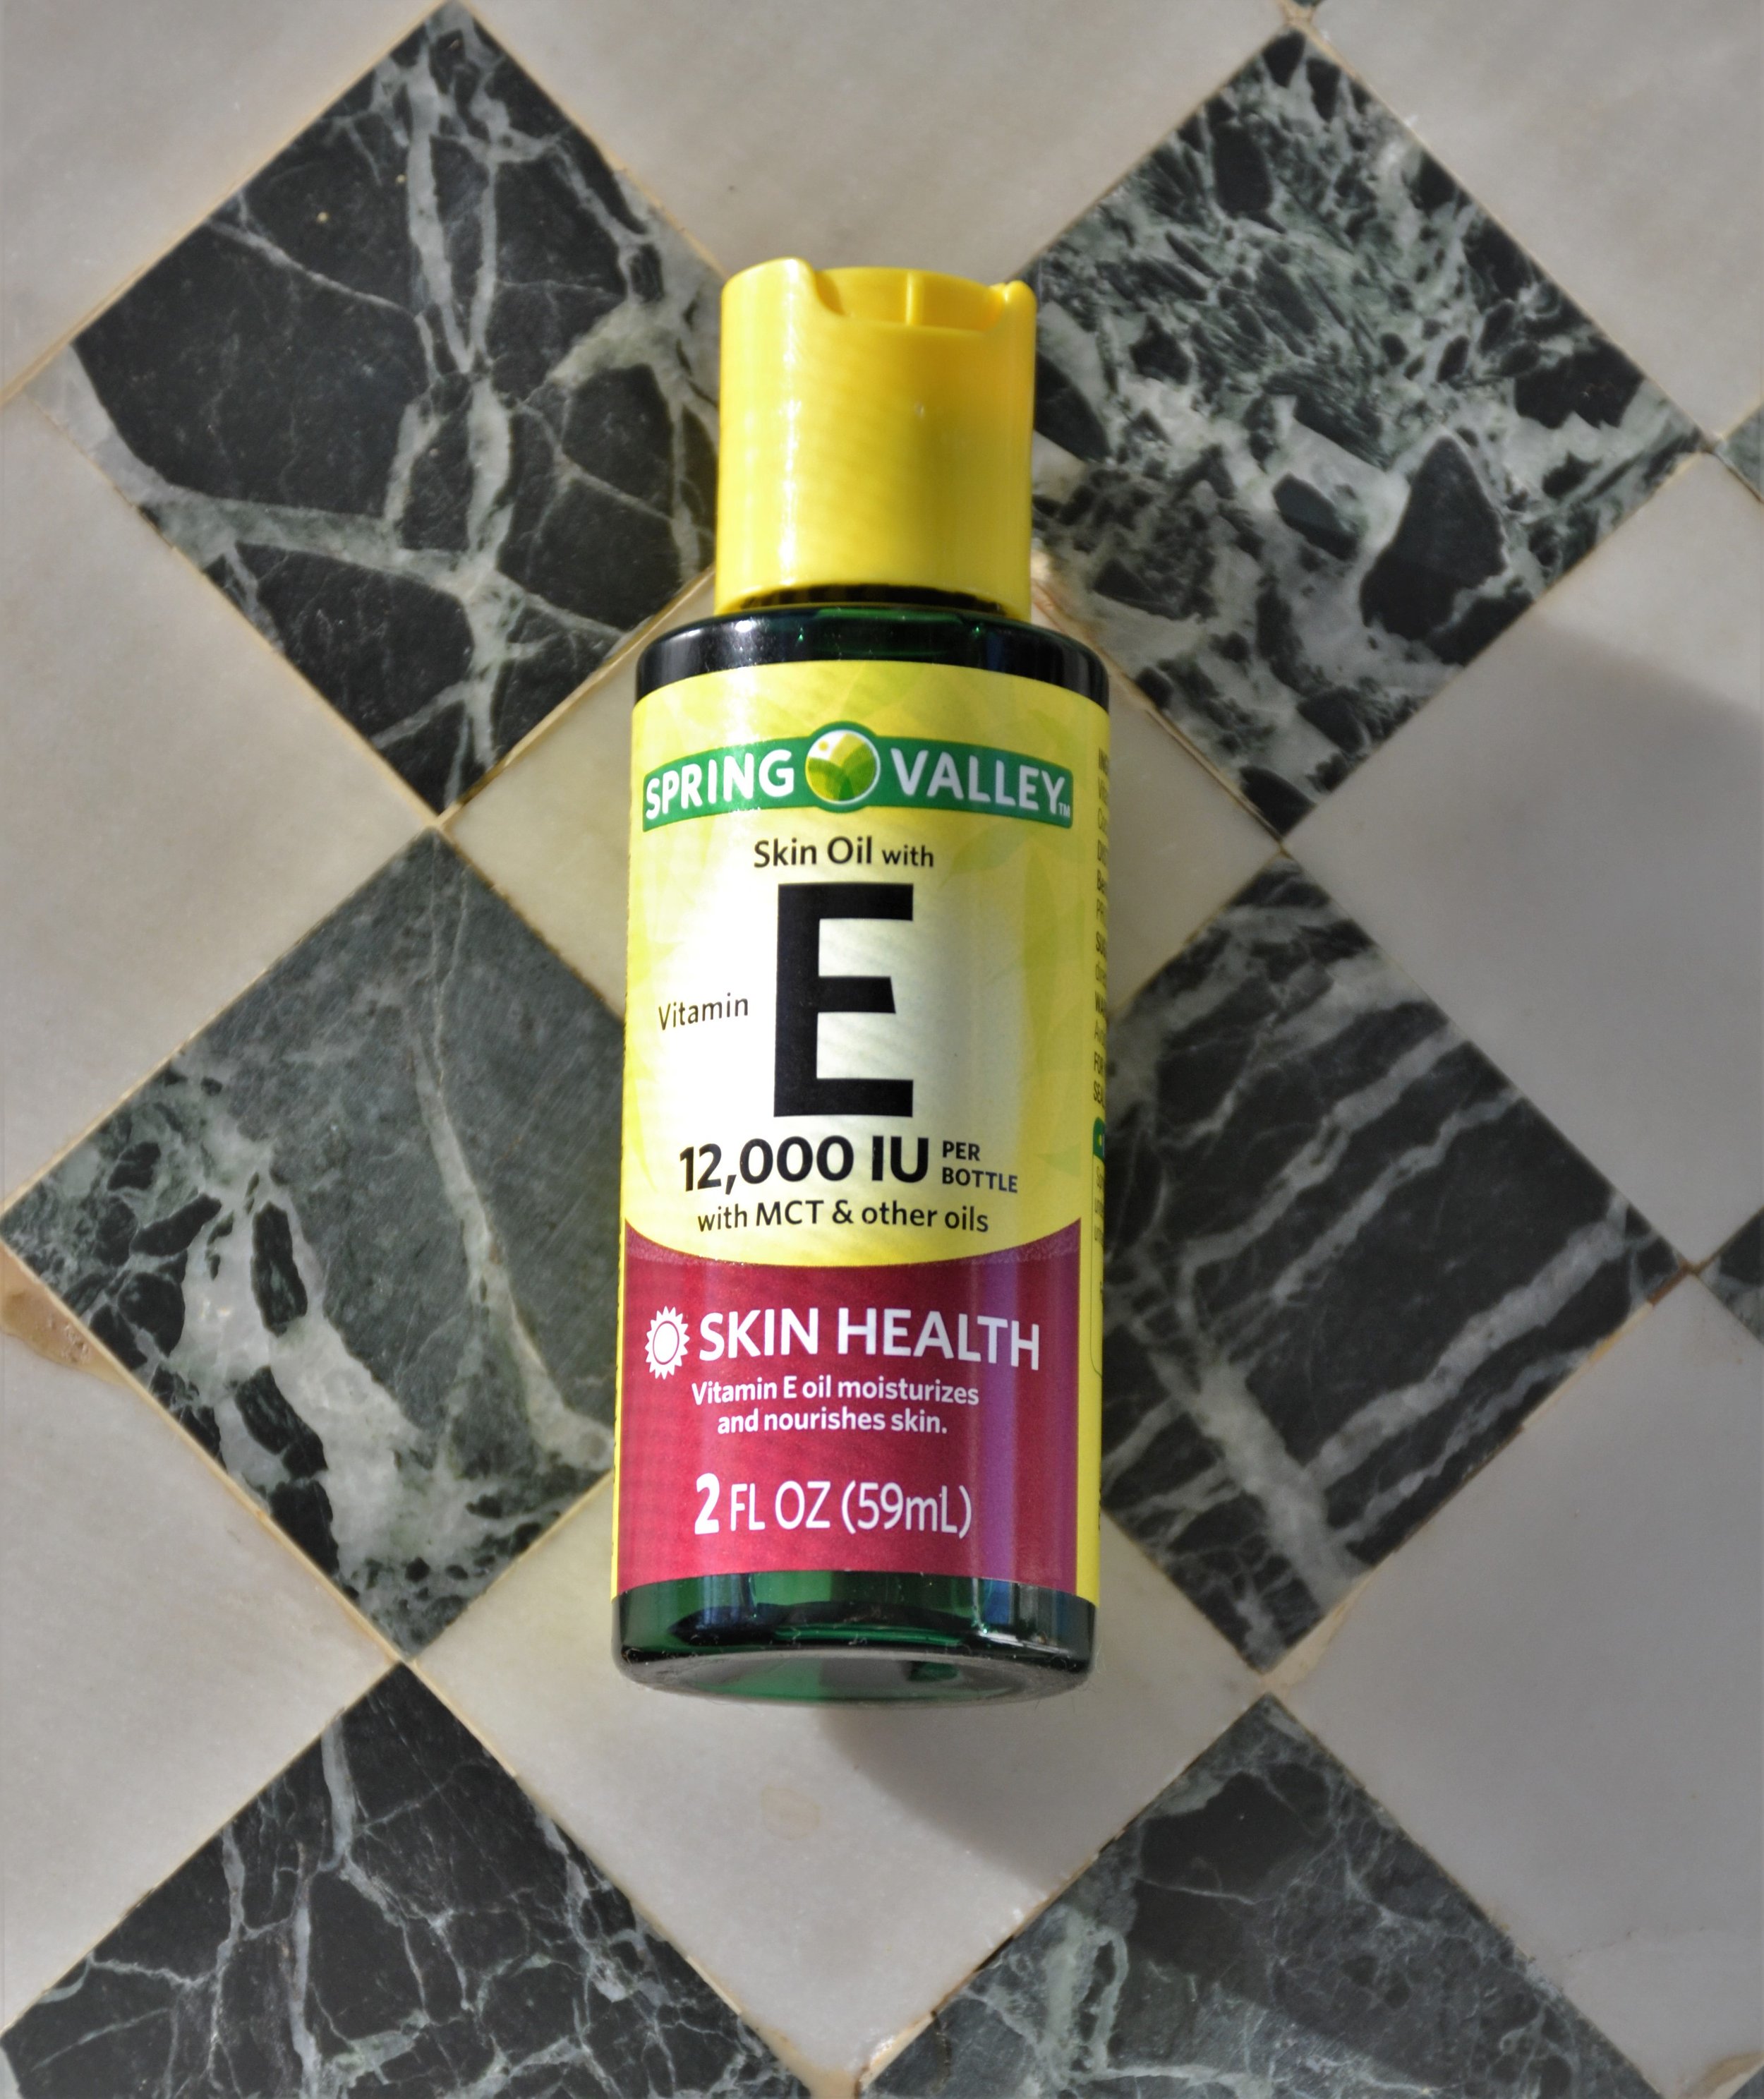
It’s just two ingredients that you’re going to use and add to your normal morning & nighttime skin care routine. First ingredient is vitamin E oil. She purchased one manufactured by Spring Valley. It’s in the vitamin section. At my store, it was on the bottom shelf of the vitamin section. If you’re looking on the vitamin aisle, you’ve got all the bottles of vitamins and pills and then this oil is at the bottom. I purchased the 2 oz bottle. The second and final ingredient is Frankincense oil and the product she recommends is made by Guru Nanda.
How To Apply:
Start with a cleansed & toned face before applying the Poshmamma Anti-Aging Glow Up skincare recipe. Pour about a nickel sized amount of Vitamin E oil and put it in the palm of my hand. Then add 1-2 drops of the Guru Nanda frankincense oil. You can mix the 2 products in the palm of your hand or wait to mix them once you apply to the face. Some people say that you lose product when you mix skincare in the palm of your hands but I just like to think that I am giving a little extra (& probably much needed) attention to the skin on my hands.
Stay tuned for my weekly progress update where I will be showing you my results after implementing these two products into my daily skincare routine.
Guru Nanda Frankincense Oil When it comes to maintaining healthy and radiant skin, there are few ingredients that can compare to vitamin E oil and frankincense oil. These two oils, when applied topically to the face, can provide a wide range of benefits that are sure to leave your skin looking and feeling its best.
Key Ingredients in This Anti Aging Skincare Recipe
First, let’s take a look at vitamin E oil. This oil is known for its powerful antioxidant properties, which can help to protect the skin from free radical damage caused by environmental factors such as pollution and UV radiation. In addition to this, vitamin E oil has been shown to help improve the appearance of scars and stretch marks, as well as reduce the appearance of fine lines and wrinkles.
Frankincense oil, on the other hand, is known for its anti-inflammatory properties, which can help to reduce redness and swelling in the skin. In addition to this, frankincense oil has been shown to help improve the overall tone and texture of the skin, giving it a more youthful and radiant appearance.
The benefits of this anti aging glow up skincare recipe with vitamin E oil and frankincense oil topically to the face are numerous. From protecting the skin from free radical damage to improving the overall tone and texture of the skin, these two oils are an essential addition to any skincare routine. So why wait? Give them a try today and see the difference they can make for yourself!
Stay tuned for my weekly progress update where I will be showing you my results after implementing these two products into my daily skincare routine.
Shop the Anti Aging Glow Up Skincare Recipe Products
Here are two products I recommend for your anti-aging skincare routine:
GuruNanda Frankincense Essential Oil (2×0.5 Fl oz) – 100% Pure, Natural, Undiluted Aromatherapy Oil for Diffusers, Supports Joint Health & Radiant Skin ($10): Shop on Amazon
Ella & Eden Organic Castor Oil (32 fl oz) – Cold-Pressed Hexane-Free Unrefined, USDA Certified & 100% Pure, For Hair Growth, Skin and Face ($26): Shop on Amazon